21 Bridal Nails for Your Special Day
Your ring finger is about to spend an entire day on camera, right next to the dress, the bouquet, and the vows. Twenty-one bridal nail designs are lined up below, from a classic French manicure with pearl accents to an opal white finish that shifts from pearl to blue under reception lighting.
Nude lace, real 24-karat gold leaf, dried flowers sealed under glass-clear polish, the range runs from quiet and romantic to genuinely elaborate, so there’s a version here whether you want your hands to disappear into the photos or steal a few of them.
A few of these designs (the hand-painted vines, the diamond dust finish) take real patience and a steady hand, so budget extra time or hand them off to a nail tech rather than attempting them the morning of.
Classic French Manicure With Pearl Accents
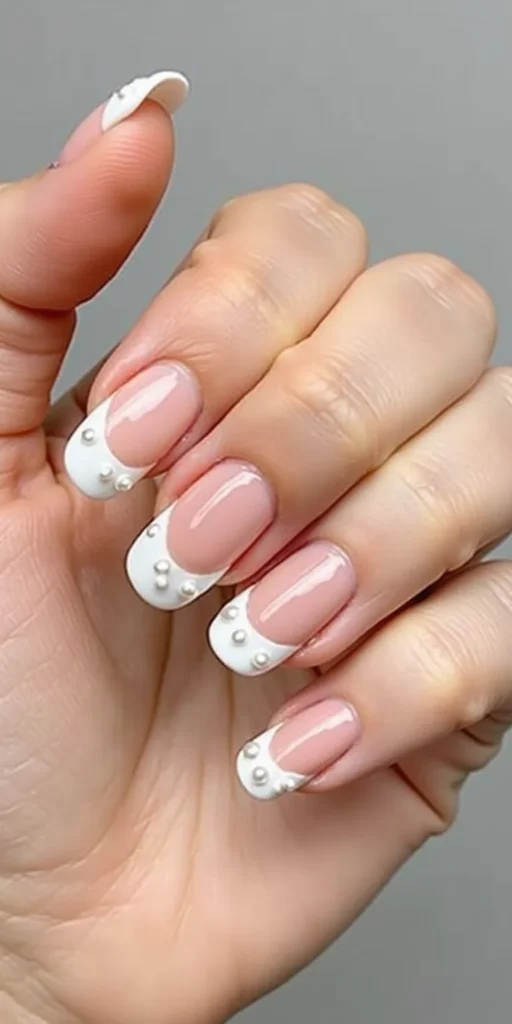
A French manicure is the safest bridal pick for a reason. Add micro pearls along the smile line and it stops looking like an office manicure and starts looking bridal.
Use a sheer pink or nude base like OPI’s “Bubble Bath” or Essie’s “Mademoiselle,” then paint crisp white tips with striping tape or nail guides and Essie’s “Blanc.”
While the topcoat is still tacky, set 2-3mm pearls along the smile line or on one accent nail with tweezers.
Two coats of a high-gloss topcoat over the top will get this through a full ceremony and reception without the pearls lifting.


Nude Pink With Delicate Lace Pattern
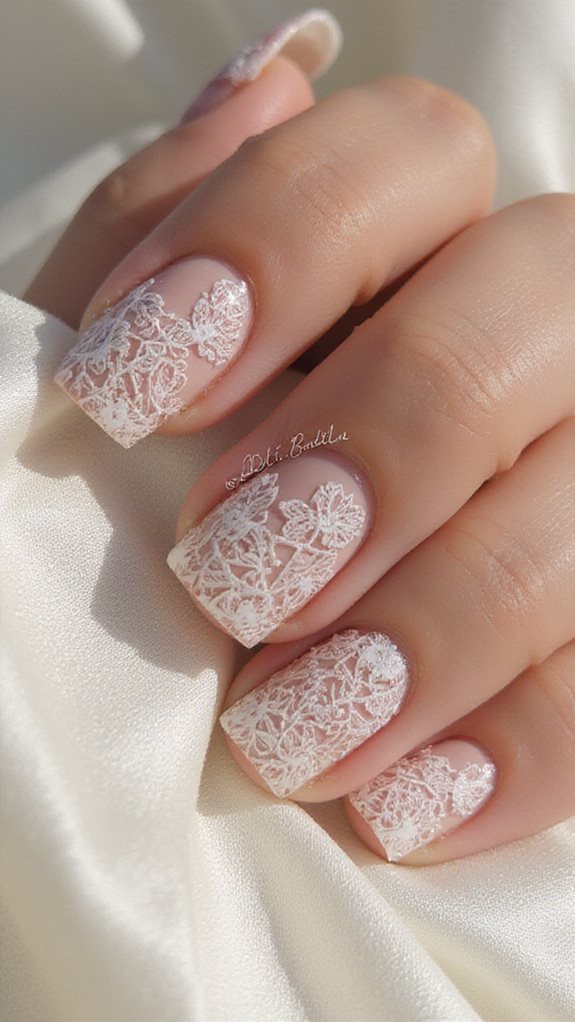
Lace shows up everywhere on a wedding day, the veil, the dress trim, sometimes the invitations, so painting it onto nude nails ties the whole look together.
A neutral base keeps this feminine rather than fussy, and a fine detail brush lets you trace scalloped edges and small floral motifs freehand.
Paint a nude pink base first, then work the lace pattern in with a fine detail brush.
Freehand lace takes a steady hand. Stamping plates made for lace patterns are the easier route if you want the same look across all ten nails without hand-painting each one.
A glossy top coat locks the detail in and keeps it from smudging through the reception.


Soft Ballet Pink With Gold Foil Details

Ballet pink reads soft against a white gown, and gold foil is what keeps it from disappearing in photos.
Two coats of ballet pink polish, fully opaque before you start on the foil, sets up against white fabric without going stark. If you’re still deciding on the dress itself, Simple Wedding Dresses For Modern Brides is worth a look before you lock in a nail color to match against.
You’ll need transfer foil, foil adhesive, and a silicone tool to press it on cleanly.
Paint thin adhesive lines along the cuticles, or work a small geometric pattern instead. The metallic against the pink photographs well in daylight but can look flat under yellow indoor lighting, so test it under your venue’s actual lights first if you can.


Sheer White With Subtle Shimmer
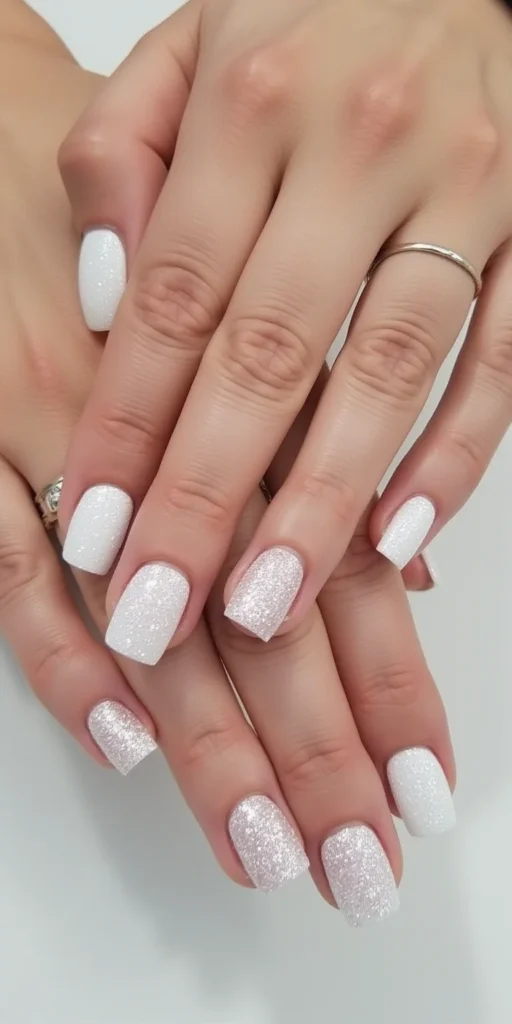
Sheer white with shimmer skips full opacity on purpose, going for a glassy look instead of a solid one.
Formulas with micro-mica or pearl powder catch light without leaving hard opacity lines where the brush strokes overlap.
Essie’s “Peak Show” and OPI’s “Put It in Neutral” both have the translucent base and fine shimmer this needs.
Two coats is the ceiling here; a third turns the shimmer opaque and kills the effect. Paint each nail in three strokes, center, then each side, and stop. This works especially well on shorter nails, where a fully opaque polish can look heavy.


Blush Rose With Crystal Rhinestones
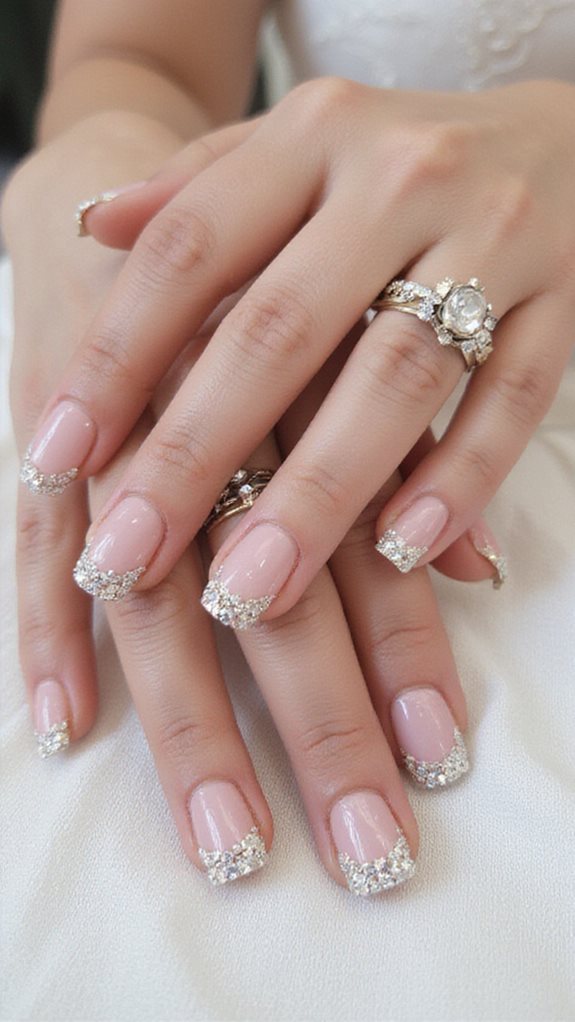
Blush rose with rhinestones is the design most likely to catch light in a first-dance photo, which is either exactly what you want or more sparkle than you’re after.
Set the crystals along the cuticle line, or cluster them into a geometric pattern on one or two accent nails instead of all ten.
Two coats of blush rose base first, fully opaque, then attach the crystals with nail glue or tacky top coat. Swarovski or Czech crystals catch more light than craft-store rhinestones.
Finish with a gel top coat brushed carefully around the crystal edges, not over them, so they stay put through the reception.


Ivory Base With Hand-Painted Florals
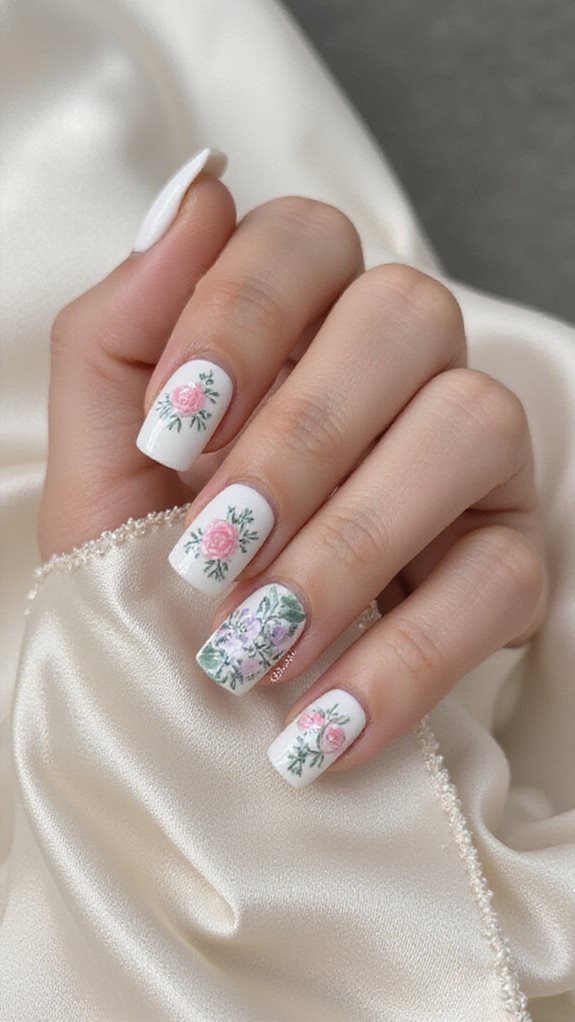
Hand-painted florals on an ivory base move past the standard French tip into something that looks made for the day.
OPI’s “Alpine Snow” or Essie’s “Vanilla Lace” work as a base; two thin layers keep it smooth without streaking.
Fine detail brushes and acrylic paint in dusty rose, sage green, and cream white give you the range for small botanical shapes.
Keep the florals small and along the outer edge, eucalyptus leaves, baby’s breath, a miniature rose, rather than covering the whole nail.
A durable topcoat like Seche Vite seals the paintwork so it doesn’t chip off in the first few hours.
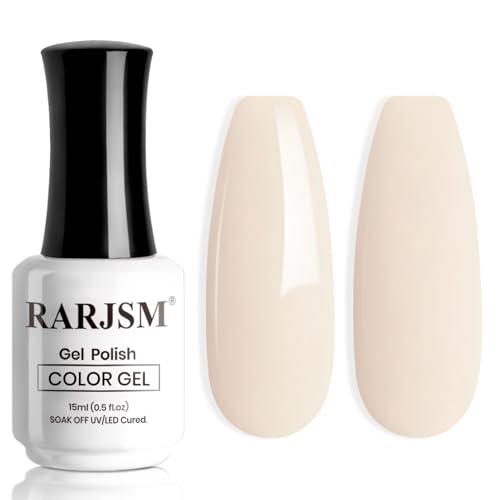

Champagne Glitter Gradient
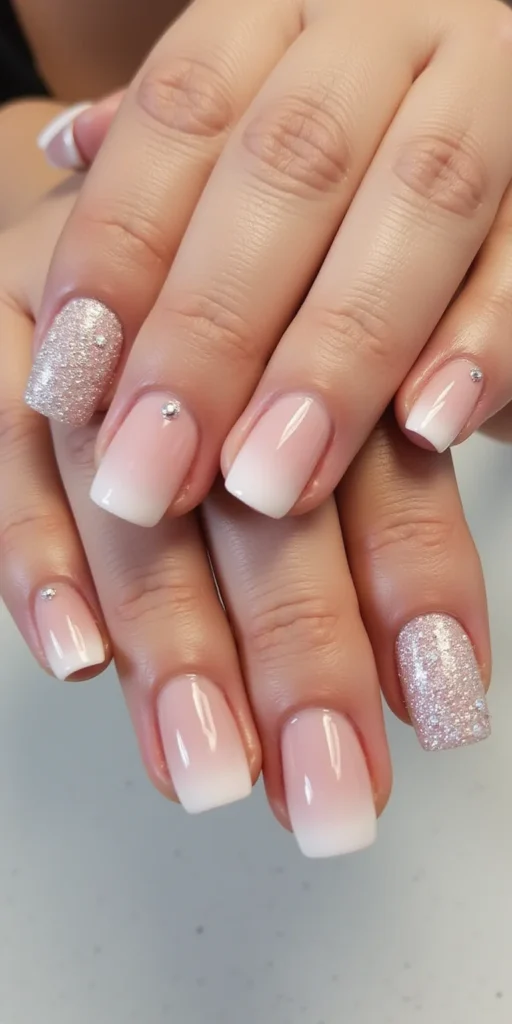
A champagne glitter gradient photographs well under both natural light and flash, which covers most of a wedding day.
Fine-grade cosmetic glitter in champagne tones gives you the gradient: dense at the tip, fading out toward the cuticle.
Start with a base coat, then two coats of nude or clear polish.
While the second coat is still tacky, dab concentrated glitter onto the tips with a makeup sponge.
Work in small sections and thin the glitter out as you move down toward the cuticle.
Two coats of a durable topcoat keep the glitter from snagging on fabric or hair over the course of the day.


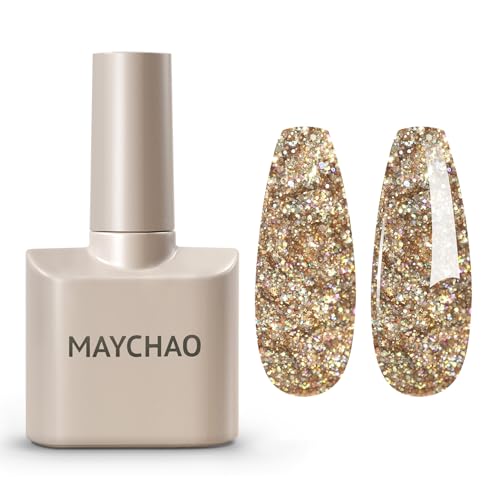
Milky White With Silver Striping Tape
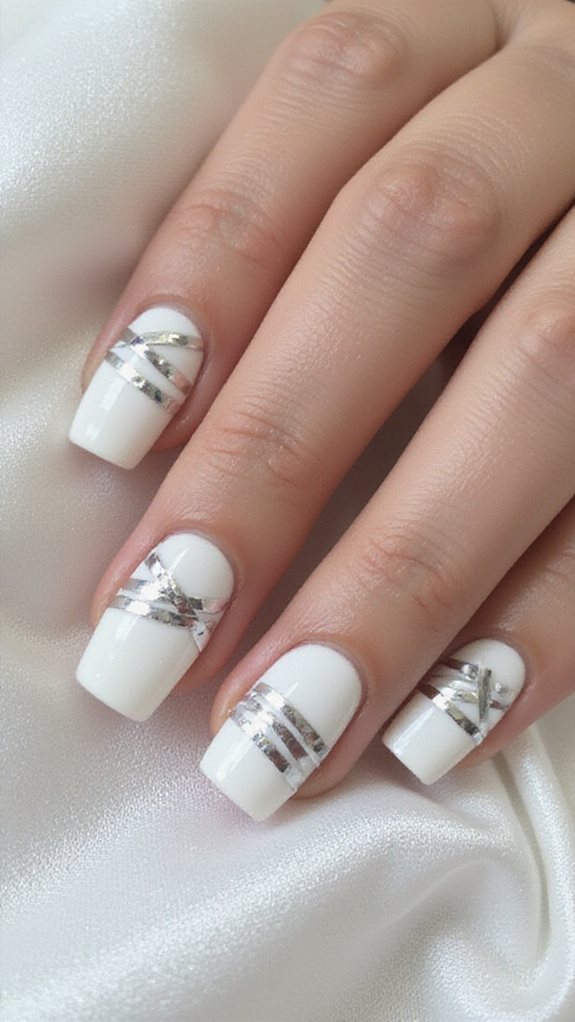
Milky white keeps things simple, and silver striping tape adds the graphic detail without any freehand painting.
Lay thin metallic tape strips over the fully dried base to build a chevron, a diagonal stripe, or a negative-space pattern. It sits well against platinum or white gold rings.
The base needs thin, even coats with full drying time between each one, or the tape won’t sit flat.
Press the tape down firmly so no air gets trapped underneath, then peel it off right away while the polish is still slightly tacky. Wait too long and it pulls the polish up with it. Seal with a quick-dry topcoat.


Dusty Rose With Pearls and Beads
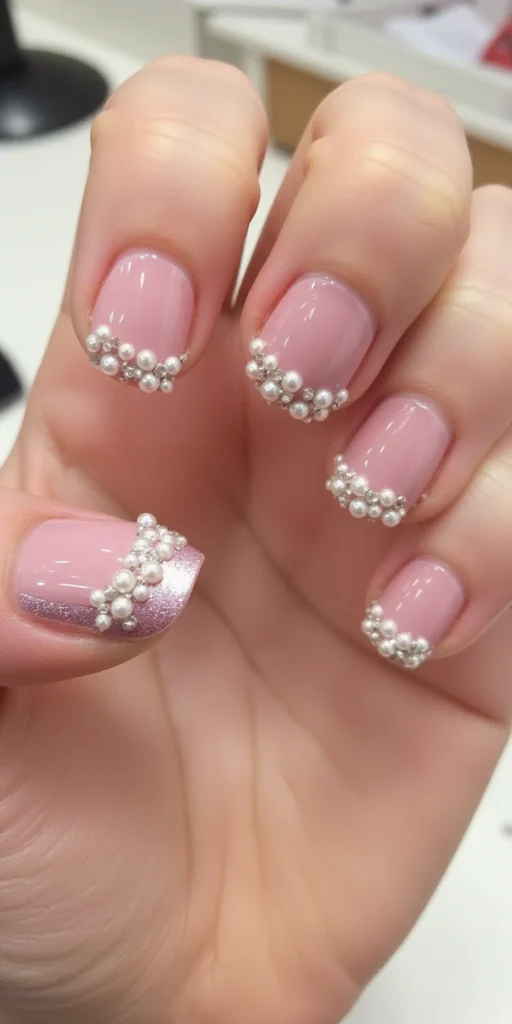
Dusty rose is muted enough that pearls and micro-beads stay an accent instead of competing with the polish underneath.
It suits a vintage-themed wedding especially well, where the soft pink echoes an antique color palette.
Two thin coats of the dusty rose base, each one fully dry before the next.
Mix pearl sizes, 3mm for a focal point, 1mm beads scattered around it, and set them with nail glue or tacky top coat. This one works on almost any nail shape; for a read on how almond compares to coffin for wear and upkeep, Almond vs Coffin Nails has the breakdown.
A high-quality top coat brushed carefully around, not over, the embellishments keeps them from lifting.
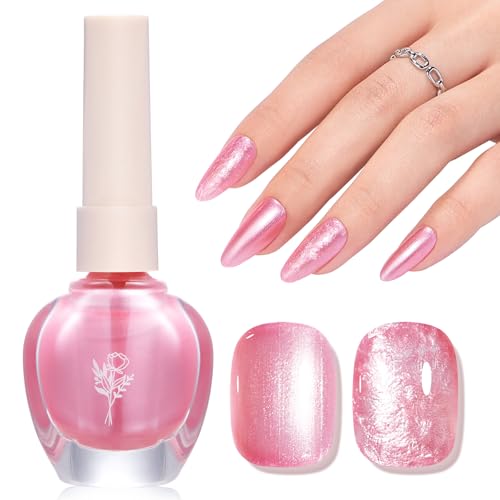


Clear Base With White French and Glitter Tips
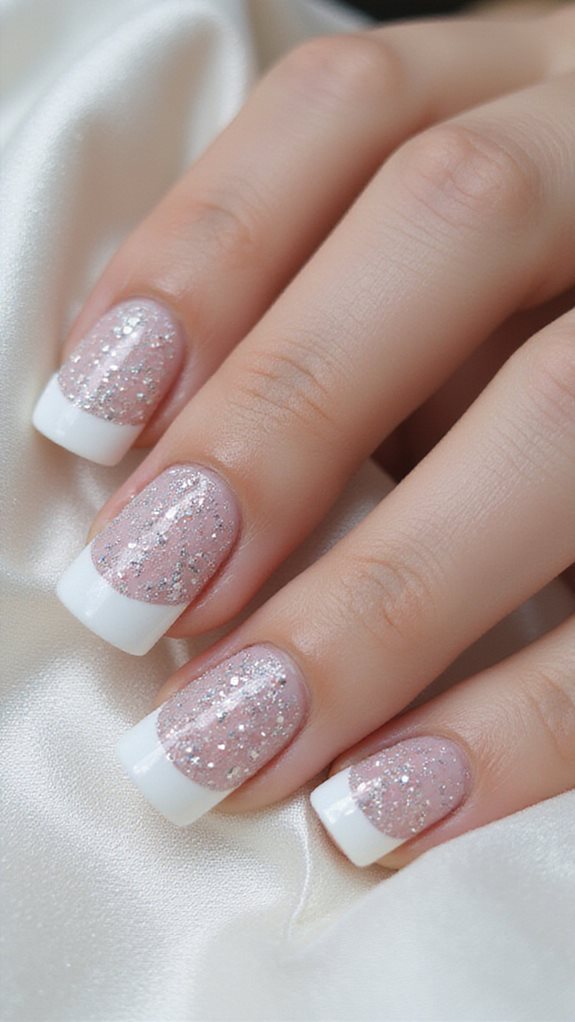
This is a French manicure with glitter worked into the tip instead of left plain, a small update on a look most brides already know they like.
Start with a clear base over the whole nail, then a crisp white tip. While the white is still slightly tacky, press fine silver or champagne glitter on with a small brush or an orange stick.
Load the glitter heaviest at the center of the tip and thin it out toward the edges for some depth instead of a flat sparkle line.
Two thin layers of a quality topcoat keep the glitter from catching on anything and chipping loose.
It’s still recognizably a French manicure, just with more shine, which makes it an easy sell if the bride wants something classic but not plain.


Soft Lavender With Metallic Accents

Lavender is the one color on this list that isn’t neutral, worth mentioning if the rest of the bridal party is going traditional and you want just your own nails to stand out slightly.
Two coats of a dusty lavender base, like OPI’s “Do You Lilac It?”, give full coverage. A makeup sponge blends deeper purple toward the cuticle for an ombre fade.
Chrome or rose gold polish painted in a precise horizontal line across the tip adds the metallic edge.
On the ring finger, use striping tape as a guide for a vertical metallic stripe instead, so it stands apart from the other nails.
A high-gloss topcoat like Seche Vite holds the color and the metallic lines together through a full day of events.


Cream With Delicate Gold Leaf
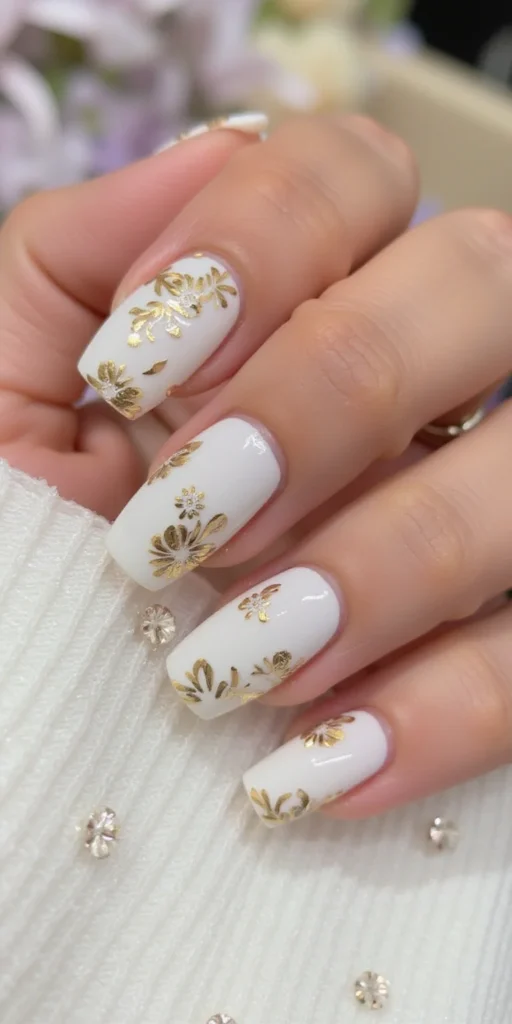
Real gold leaf is the priciest material on this list, so this design works best if the budget has room for it. OPI’s “Put It in Neutral” or Essie’s “Marshmallow” are solid cream bases to build it on.
Genuine 24-karat gold leaf, pressed onto tacky topcoat with a dry brush, forms organic patterns along the cuticle or on a single accent nail. Corner placement or thin veining reads more current than covering the whole nail.
You’ll need sizing adhesive, loose gold leaf sheets, and precision tweezers, and it’s genuinely fiddly work, so this is one to book with a nail tech rather than attempt solo the night before. Two thin topcoat layers seal it in. Almond or oval shapes give the gold leaf more surface to sit on than a short round nail would.


Baby Pink With Diamond Dust Finish

Diamond dust catches more light than a standard glitter polish, so this design shows up clearly in flash photography even from across the room.
A sheer baby pink base first, then diamond dust powder pressed on with a dense brush while the polish is still tacky, evenly across the nail or concentrated where you want more sparkle.
Concentrating it at the tips gives an ombre effect; full coverage on one or two accent nails is the other option.
Timing matters here: the powder has to go on right after the color, before curing under LED light, or it won’t adhere evenly. Done right, it pairs well with white gowns and silver jewelry without competing with either.


Sheer Peach With White Dot Details
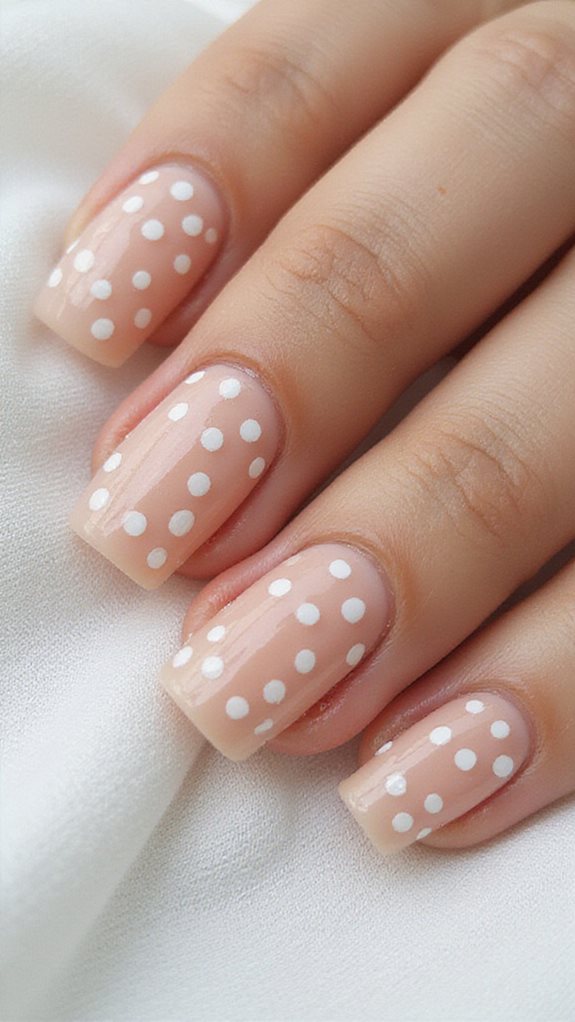
Sheer peach with white dots is quiet compared to most of the other looks on this list, and that’s the appeal for a bride who wants something bridal without much statement.
OPI’s “Put It in Neutral” or Essie’s “Tinted Love” work as the sheer peach base; two thin coats keep it even without going opaque.
A dotting tool, or a bobby pin dipped in white polish, gives you control over dot placement, either lined up along the nail’s center or scattered for a looser pattern.
It suits shorter nails particularly well, since the small dots add interest without needing the extra length some other designs rely on.


Pale Coral With Rose Gold Highlights
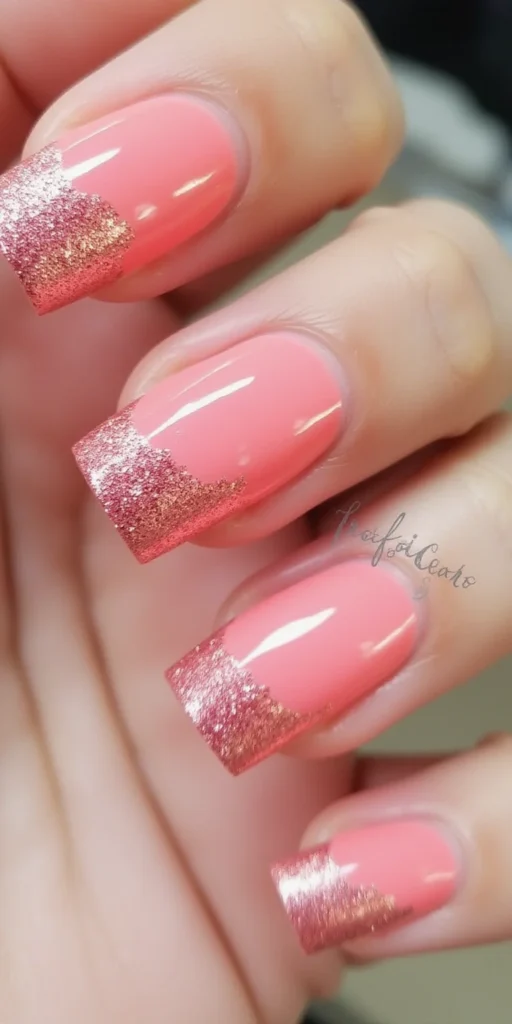
Coral reads warmer than the pinks and creams elsewhere on this list, worth considering if your skin tone leans warm and the pale pinks have felt slightly washed-out on you before.
It’s picked up popularity at weddings for exactly that reason, a fresher alternative to the usual nude or pink base.
Rose gold accents along the cuticle edge, or worked into a small geometric shape, add shine without covering up the coral underneath.
The combination holds up under mixed lighting, daylight for the ceremony, low light for the reception, without shifting color noticeably.


Translucent With Embedded Dried Flowers

Sealing a real dried flower under clear polish is as literal as “bridal” gets, and it holds up surprisingly well once it’s fully cured.
Professionally dried petals, baby’s breath, lavender, a miniature rose, work better than flowers you dry yourself, which tend to still hold moisture and discolor under the polish. Position them with tweezers over your base coat, then seal with several thin topcoat layers.
The petals need to be completely dehydrated first, or the color bleeds into the polish. A UV gel system cures harder and holds the petals in place longer than air-dry polish does.
Skip placing the same flower on every nail. One or two accent nails with a larger petal, the rest left bare or minimal, reads more intentional than a full set.


Warm Beige With Copper Foil Stripes
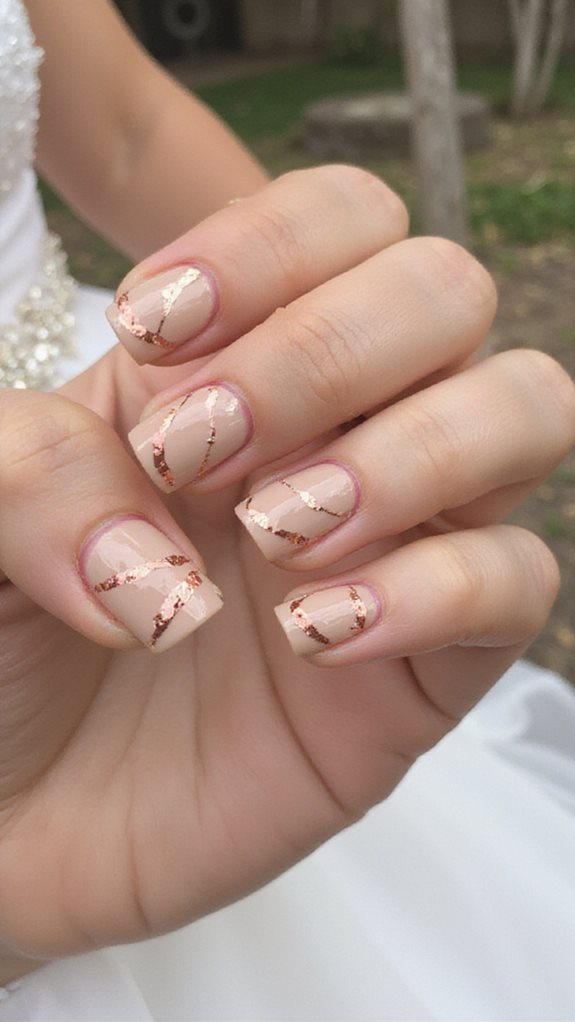
Copper is warmer than silver or rose gold, so it’s the metallic to reach for if your other jewelry, or the venue’s decor, leans toward warm tones.
A warm beige base, OPI’s “Samoan Sand” or Essie’s “Sand Tropez” both work, sets up the foil. Keep the copper strips to an accent nail or the ring finger rather than the full set; it comes across as intentional detail instead of overload.
Press the metallic strip onto tacky topcoat and smooth it down so no air pockets form underneath.
A diagonal or geometric strip placement looks more current than a straight line across the tip. Seal with a quality topcoat so the foil doesn’t lift by the end of the night.


Light Mauve With Holographic Flakes
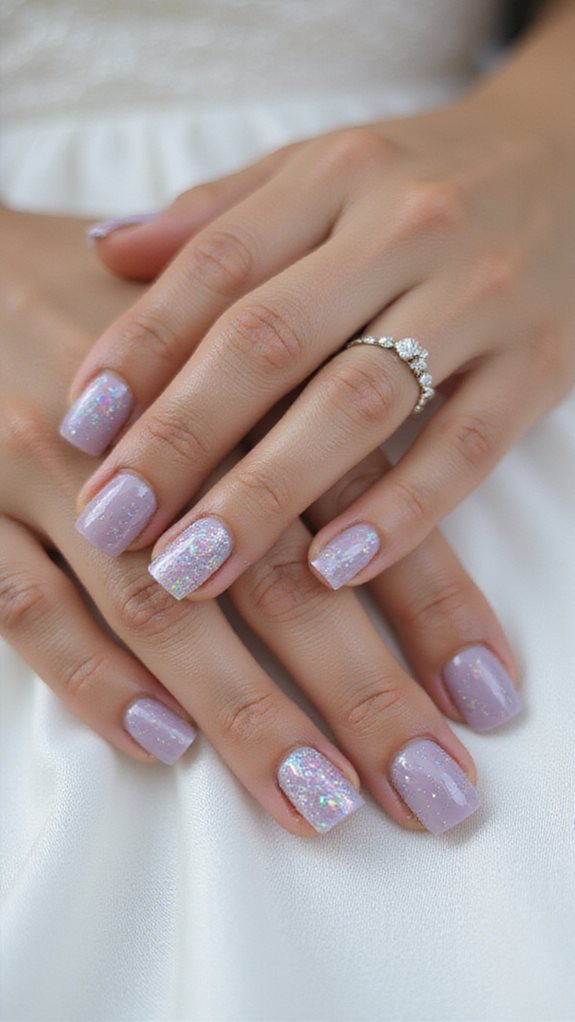
These holographic flakes barely show in daylight, then throw rainbow flashes under reception lighting and camera flash, worth knowing before you commit if you want the effect visible in your ceremony photos too.
Light mauve is the base, neutral enough not to compete with the flakes, and it’s been one of the more requested finishes for weddings recently.
Two coats of the mauve polish, then press holographic flakes onto the still-tacky top layer with a silicone tool.
Concentrate the flakes on one or two accent nails, or spread them thinner across all ten for a gradient effect. A high-gloss topcoat keeps them from catching and lifting.


Opal White With Iridescent Topcoat
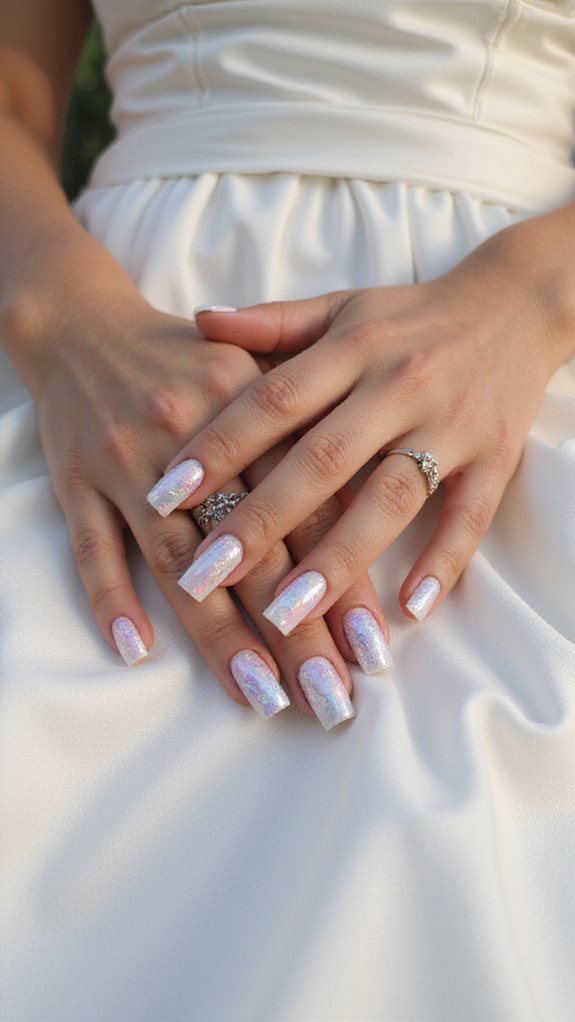
A plain white manicure with an iridescent topcoat over it shifts between pearl, pink, and blue depending on the angle, closer to how an actual opal or moonstone catches light than a flat white polish does.
OPI’s “Alpine Snow” or Essie’s “Blanc” both work as the base, two thin coats for solid, opaque coverage.
One coat of an iridescent topcoat with mica or holographic pigment goes over the base in smooth, even strokes.
A regular clear topcoat on top locks in the shine and adds the durability the iridescent layer alone doesn’t have.


Soft Gray With Silver Glitter Accent Nail

Gray isn’t a color most brides think of first, but a dove or charcoal gray gel base with silver glitter on one accent nail reads modern rather than muted.
The ring finger is the usual spot for the glitter, since that’s the nail everyone’s looking at anyway.
Thin coats of glitter layered over tacky base gel, then sealed with a high-gloss topcoat, hold up better than one heavy coat. Fine micro-glitter looks more refined here than a chunky glitter would.
A dehydrator and primer before the gel base extends how long the set lasts. For a side-by-side on gel versus acrylic before you book, Gel vs Acrylic Nails breaks down the trade-offs, and daily cuticle oil afterward keeps the nail bed from drying out under the gel.


Pure White With Hand-Painted Vines
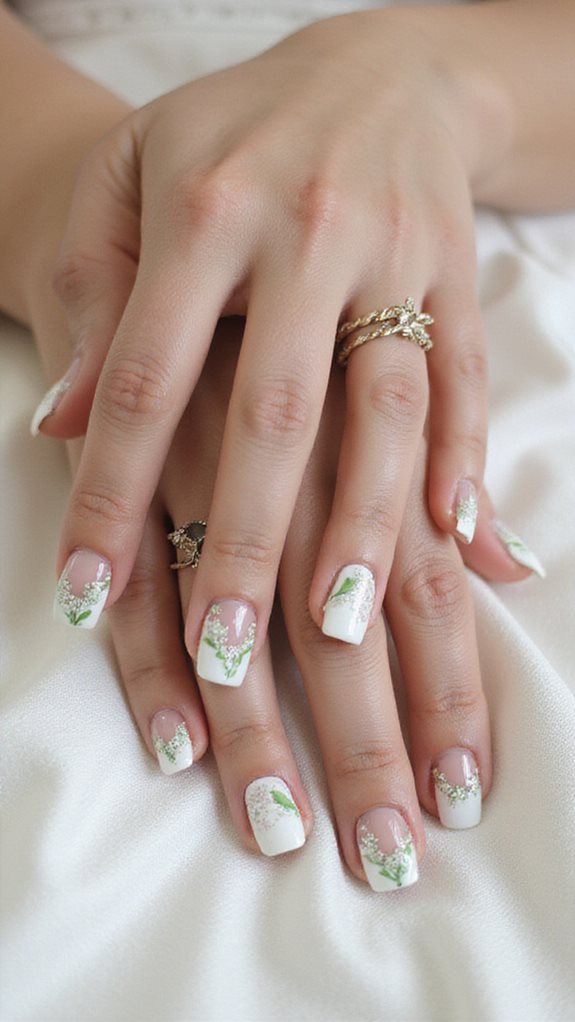
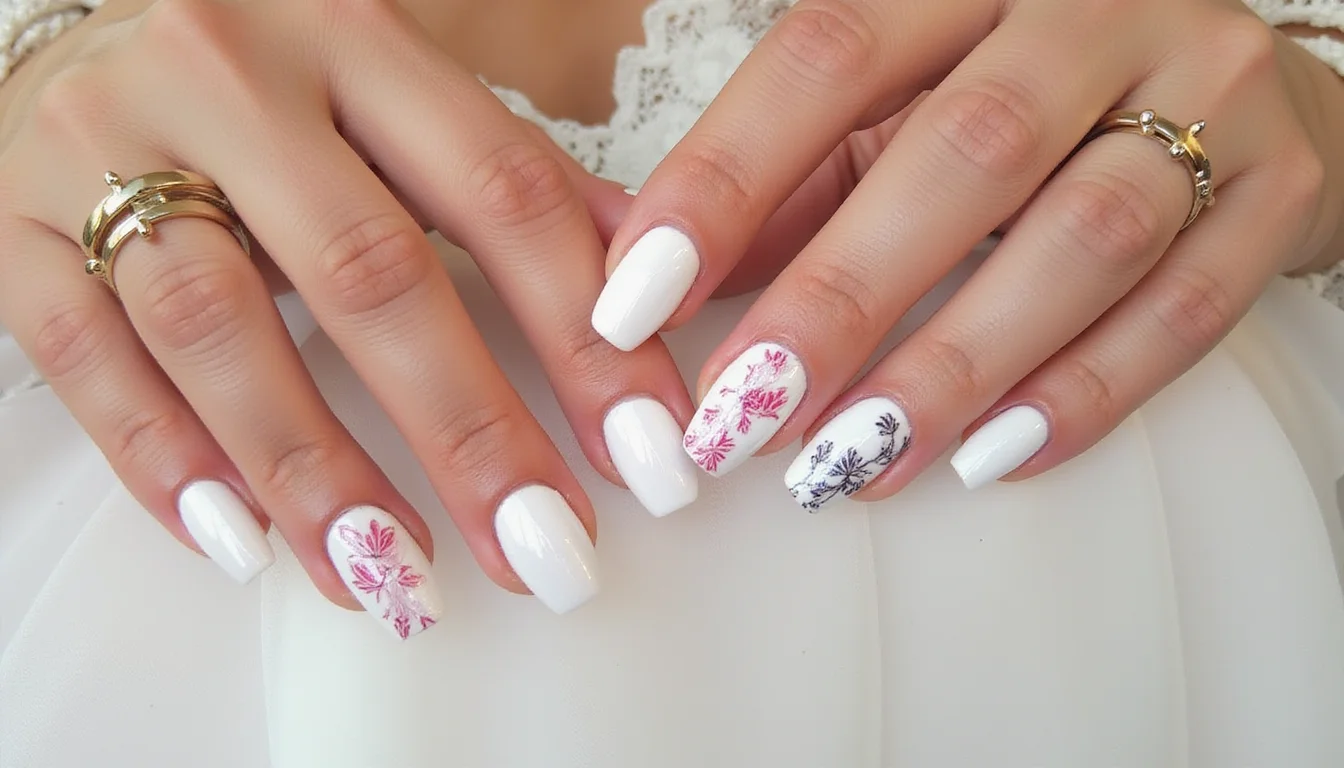
Hand-painted vines on a plain white base take longer than almost anything else on this list, but they’re also the design most likely to look completely custom rather than pulled from a catalog.
A high-opacity white gel base in two thin coats gives full coverage. The vine work itself needs a steady hand and a fine detail brush, sized 000-00, or thin acrylic paint.
Start each stem at the cuticle and let it curve naturally along the nail. Small dabbed leaves and some variation in line thickness keep it from looking stiff or traced.
A durable topcoat over the artwork holds it through the day. This isn’t a design to learn on your own nails the week of the wedding, plan on booking a nail artist who’s done freehand botanical work before.


Frequently Asked Questions
How Long Should I Book My Bridal Nail Appointment Before the Wedding?
Book your bridal nail appointment 1-2 days before the wedding, close enough that the manicure still looks fresh, with enough buffer to fix anything that goes wrong before the day itself.
What Nail Length Is Best for Wedding Photos and Ring Ceremonies?
Medium length photographs best for ring shots, long enough to look finished without drawing attention away from the ring itself. Almond and oval are the two shapes brides ask for most, since neither one competes with the ring for attention.
How Can I Make My Bridal Manicure Last Through the Honeymoon?
Cuticle oil daily and rubber gloves for anything involving water or sand will do more for longevity than the polish brand does. A stronger base coat, OPI Nail Envy is a reliable one, also helps the set hold up through a week of travel. There’s more on strengthening the nail bed itself, not just the polish, in Caring for Brittle Nails, worth a look if peeling or brittleness has been an issue before.
Should I Bring My Wedding Dress Fabric to Match Nail Colors?
Bringing a fabric swatch is worth the extra step if you want the polish to actually match the dress rather than just complement it. Gel systems like OPI GelColor or Essie Gel Couture hold color truer to the sample than regular polish does.
What’s the Typical Cost Range for Professional Bridal Nail Services?
Expect $40-150 for a professional bridal manicure, depending on the salon and your location. Almond and coffin shapes typically cost more than a basic round or square set, and detailed nail art like foil, hand-painting, or embellishments adds another $20-50 on top.
Final Thoughts
Whichever design you land on, a gel-based system holds up better against chipping over a long wedding day than regular polish does, and a water-based topcoat keeps shimmer finishes from yellowing.
Book a trial run before the wedding itself, ideally under lighting close to what your venue will use, so you’re not seeing the color for the first time on the day.
The nails don’t have to match everything else exactly, but if hair is still undecided, Bridesmaid Updo Hairstyles is worth a look alongside your nail choice.