Short and Sharp: 21 Edgy Pixie Cuts for Fine Hair After 50
Short hair doesn’t have to play it safe, and fine hair specifically benefits from going shorter rather than fighting for length it can’t hold onto. Cropped length creates real density on its own, which longer fine hair can’t do no matter how it’s styled.
A lot of these cuts look similar in a photo but rely on different techniques underneath: where the asymmetry comes from, how much guard length a clipper uses, whether a section is cut short or just styled that way. Those details are what actually decide how each one wears.
The Classic Short Pixie for Fine Hair
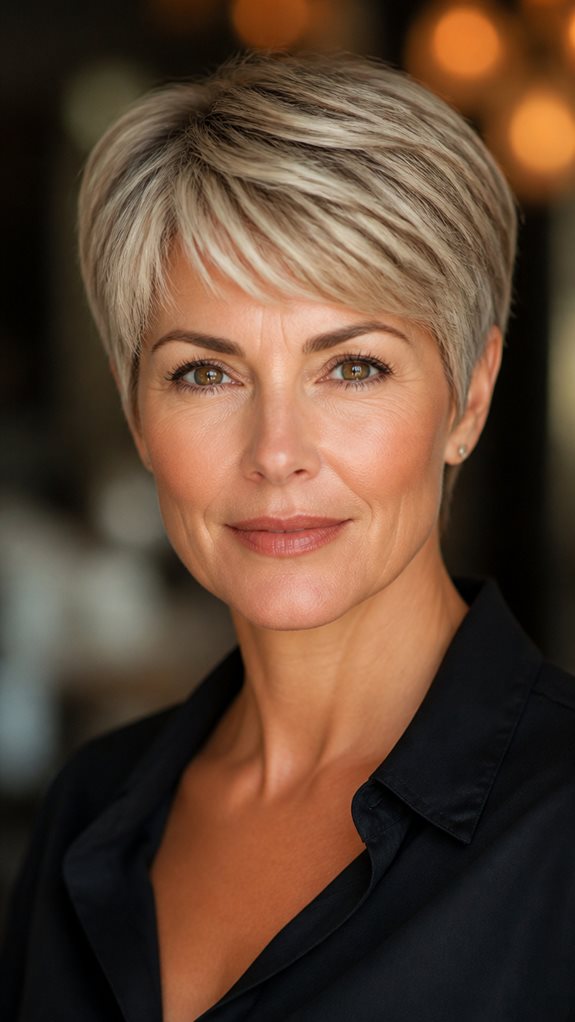
Sides and back stay cropped close, while the top holds slightly more length, usually around an inch, which is what gives this cut its structure without adding real weight.
Texturizing the crown with point-cutting, rather than leaving it blunt, breaks up the top so it doesn’t sit as one flat panel of hair.
Trims every four to six weeks matter more here than on longer cuts, since there’s no length to hide the shape losing its edges as it grows out. For more variations built on this same base shape, see the modern pixie cuts for older women collection.


Textured Crop With Choppy Layers
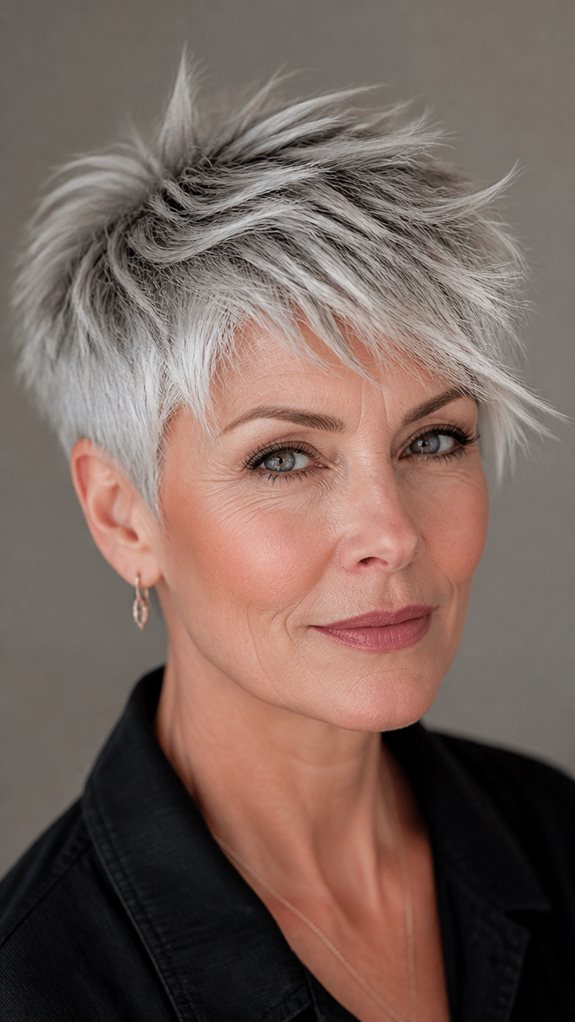
Unlike the classic pixie, this version cuts layers throughout the crown rather than treating the top as one length, which is what creates the choppy, uneven edges.
A paste or pomade worked through damp hair, then scrunched rather than smoothed, keeps those layers separated instead of settling back into one flat shape as it dries.
Ask for disconnected layers specifically around the crown and nape. That’s the detail that keeps this looking cut with intention rather than just left to grow shaggy.


The Asymmetrical Pixie Cut
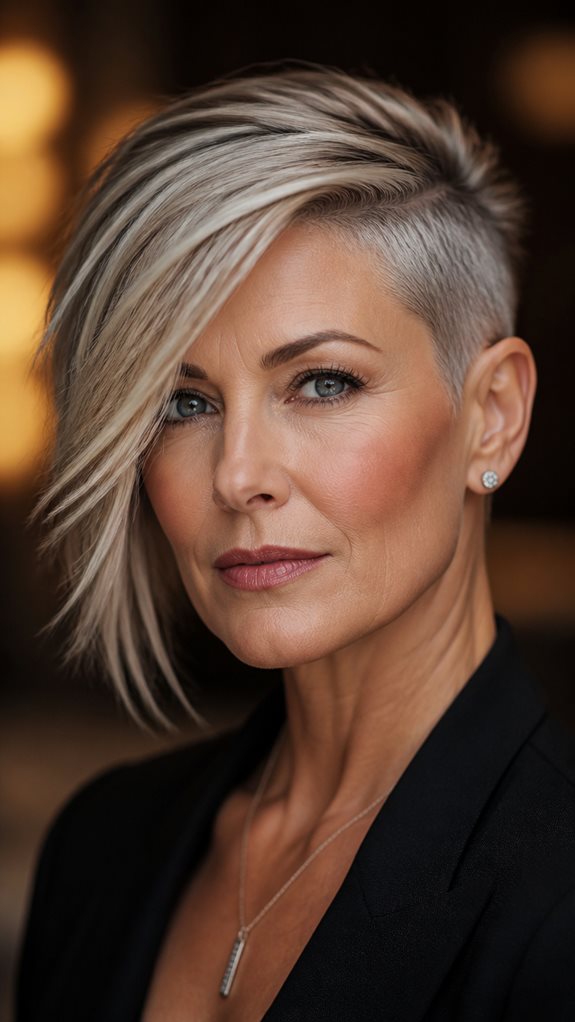
This is a cutting choice, not a styling one. One side is cut a full one to two inches shorter than the other, with a hard line rather than a gradual taper between them.
The longer side grazes the cheekbone, while the shorter side exposes the neckline, giving the cut two distinct focal points instead of one.
A refresh every four weeks keeps the hard line sharp. Once it grows out even slightly, the contrast softens and the cut starts to look unfinished rather than deliberate.


Undercut Pixie for Maximum Volume
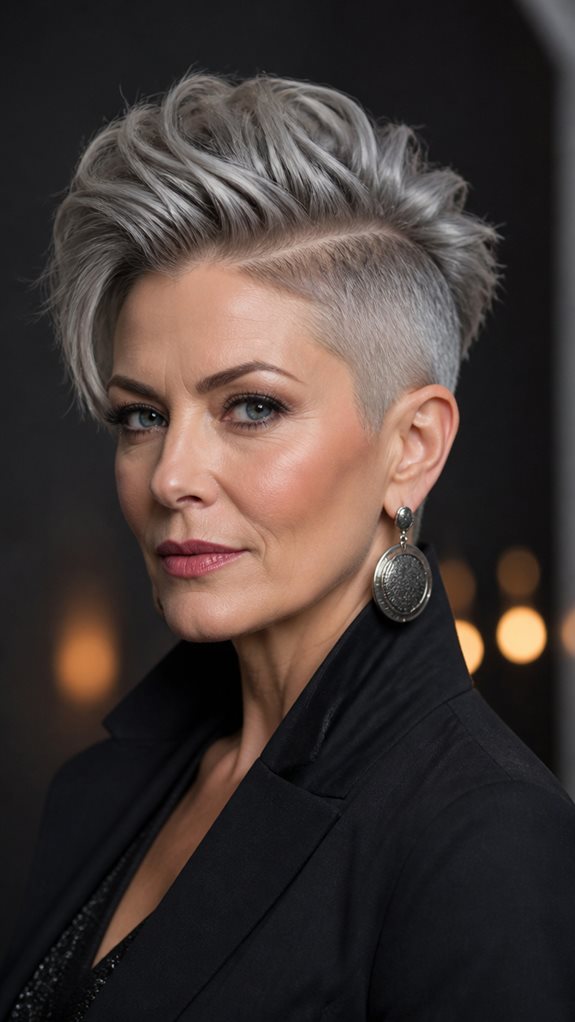
Clippers with a number one or two guard remove the underneath layers close to the scalp, leaving two to three inches on top. That’s shorter than the shaved-sides version further down this list, which uses a closer guard or a razor for a fully smooth finish instead.
Removing that underneath weight is what lets the top layers actually lift, rather than getting dragged down by the hair underneath them.
This solves a structural problem rather than styling around it, which matters more for genuinely thinning hair than a cut that just distracts from it. The same structural fix shows up in more forms in the haircuts for thinning hair over 50 guide.


Wispy Pixie With Feathered Ends
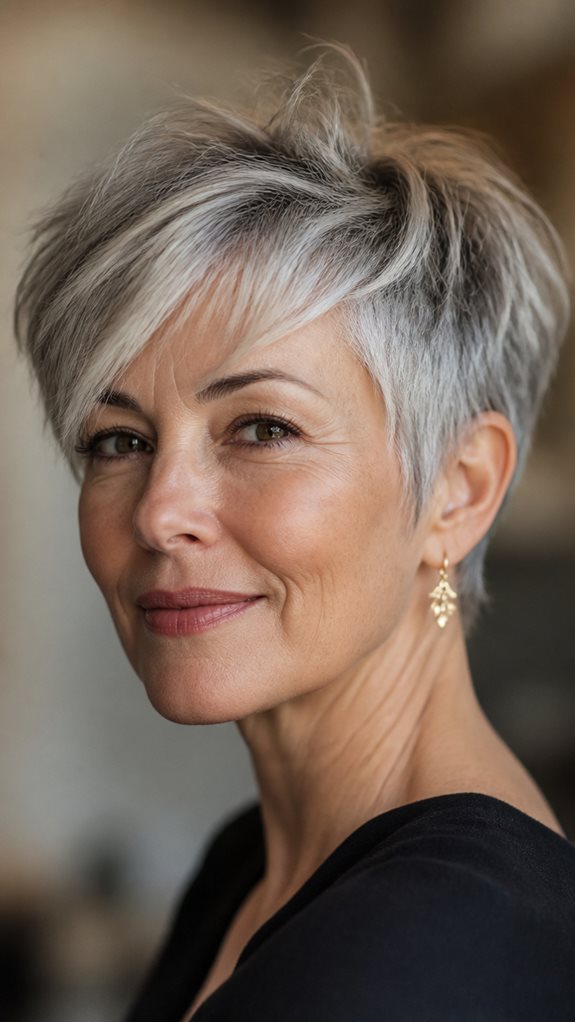
Point-cutting happens only at the very ends here, angled rather than straight across, which is a narrower, gentler version of the layering used throughout the textured crop earlier in this list.
A texturizing cream or light pomade defines those feathered ends without the heaviness a stronger-hold product would add.
Drying with fingers instead of a brush preserves the separation between the wispy pieces, where a brush would just smooth them back into one shape.

Bold Side-Swept Pixie Cut
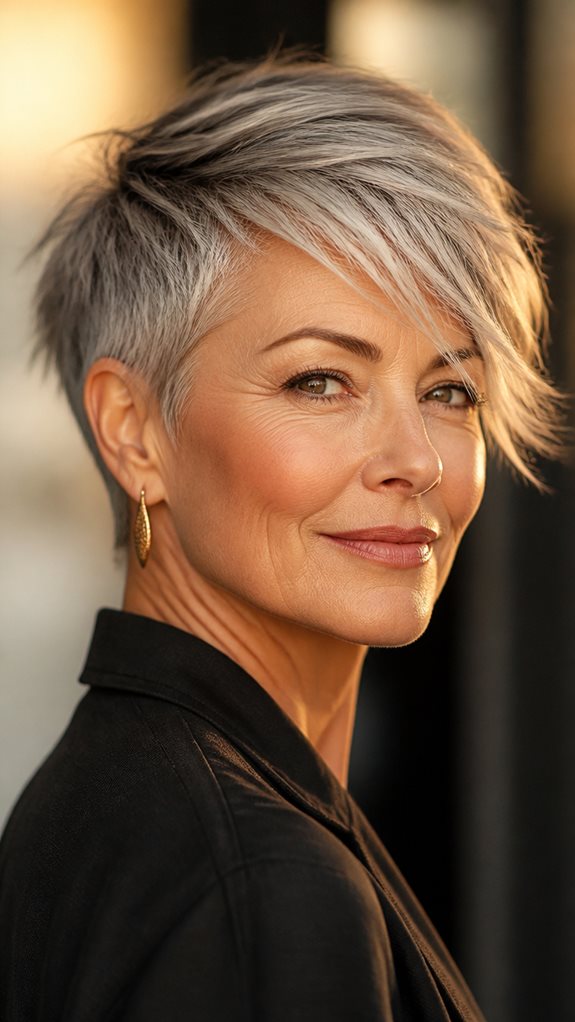
This one is mostly a styling direction rather than a cutting choice. The top length gets brushed and product-set to one side, unlike the asymmetrical pixie earlier, where the two sides are actually cut to different lengths.
Sweeping the longer top section across the forehead creates a diagonal line that lifts the hair away from the scalp, giving it more visual height than it would have lying flat.
A flexible-hold pomade keeps that sweep in place through the day without the stiffness a stronger gel would leave behind on fine strands.


The Disconnected Pixie for Fine Hair
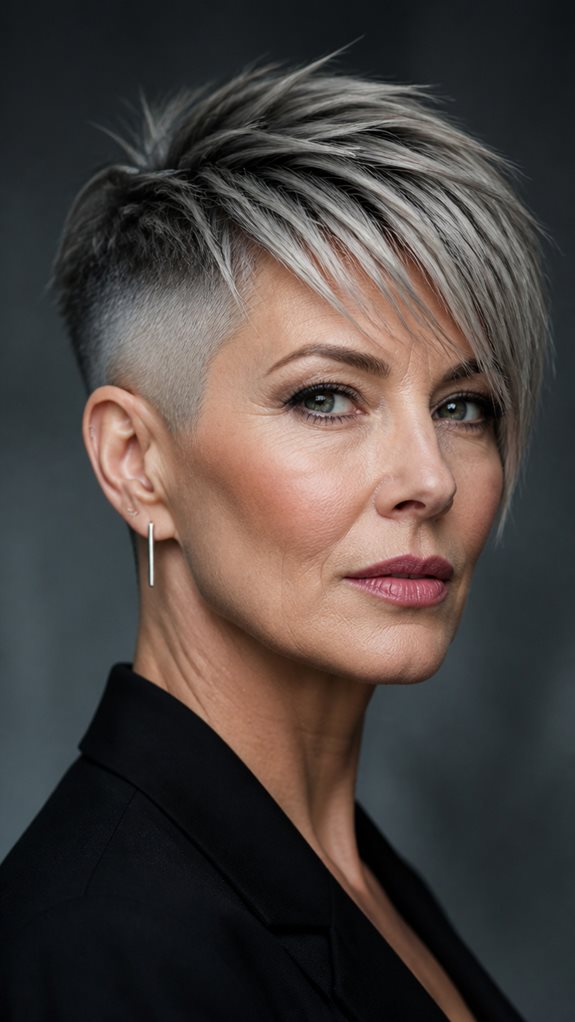
Disconnection means cutting two sections with no blended transition between them at all, a sharper break than the graduated tapering most pixie cuts use between the crown and the sides.
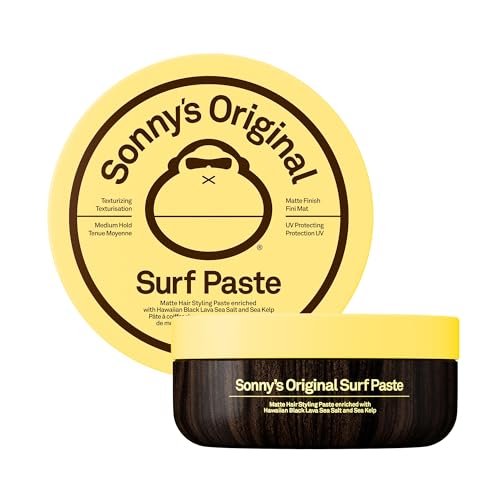
Texturizing paste defines that separation line precisely, which matters more on fine hair since there’s less natural texture to hold the line on its own.
Two-tone color placed right at the disconnection point makes the break even more obvious, and it also happens to soften a square jawline in the process.


Pixie Cut With Shaved Sides
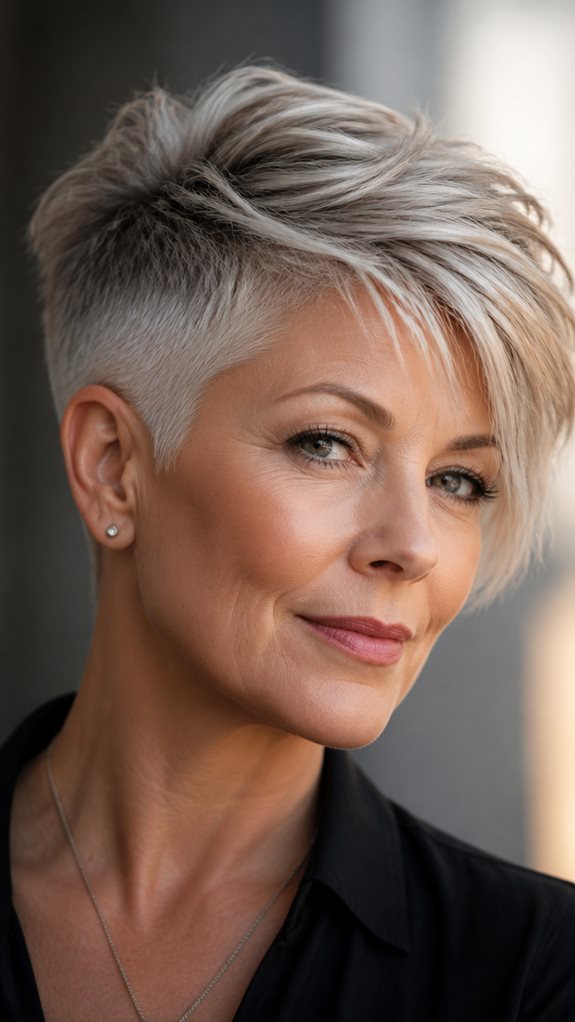
This goes closer to the scalp than the undercut version earlier, using a razor or a guard-less clipper pass at the temples and nape for a fully smooth finish rather than a short clipper texture.
Removing that much volume at the sides draws the eye straight up to the crown, which is where all the remaining length and texture sits.
Because bare skin grows visible stubble faster than a clipper-guard undercut does, this version needs maintenance every three to four weeks, closer than most other cuts on this list.


Soft Curly Pixie for Fine Hair
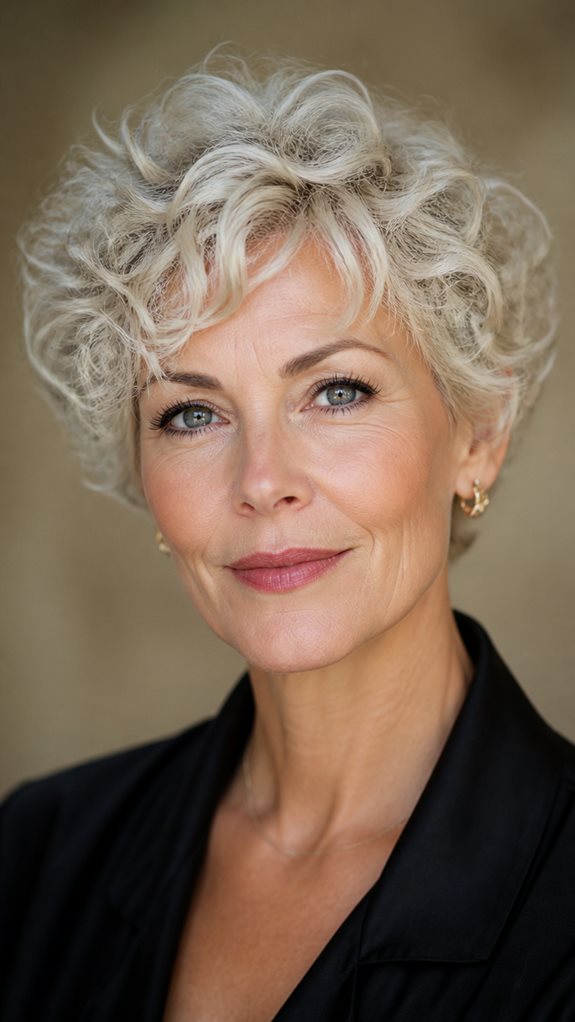
Keeping the crown longer than the sides gives natural curl room to spring upward instead of curling flat against the scalp.
A curl cream rather than a heavier gel defines each curl without gluing them together into one clump, which happens easily on shorter hair.
Diffusing rather than air-drying holds the root lift through the day. Air-drying on this length tends to let the curls relax and sit closer to the head than intended.


The Faux Hawk Pixie Cut
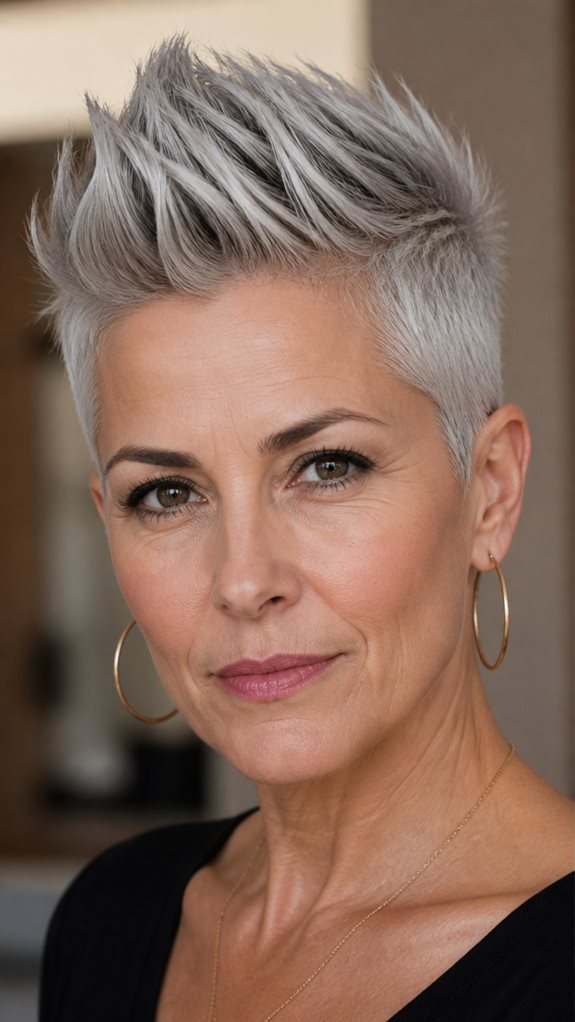
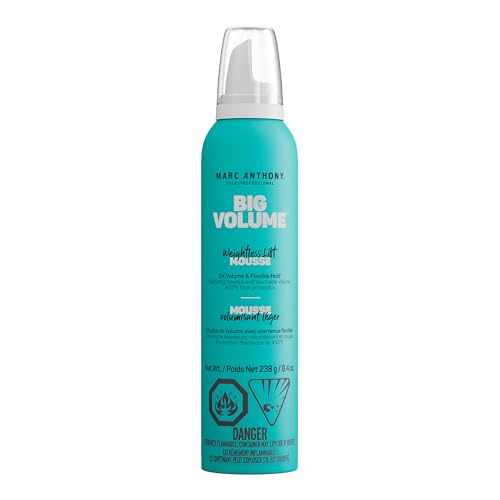
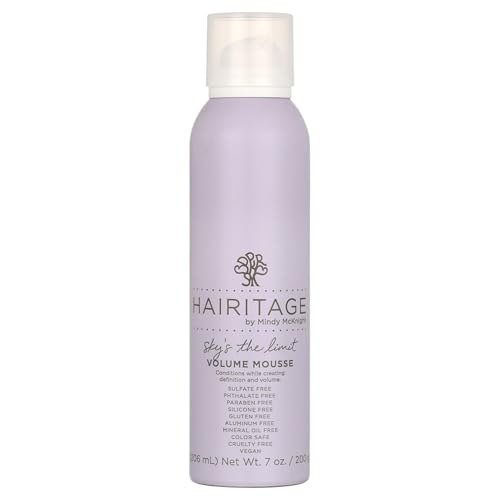
This is a styled effect on a standard short pixie base, not a separate cut. Fingers push the center section up and forward while a volumizing mousse builds lift at the roots underneath.
A flexible-hold pomade locks the shape in place afterward, since mousse alone won’t hold height through a full day.
The mohawk-inspired cut further down this list gets closer to the same look through the actual haircut instead, which holds up longer without needing this level of daily styling. This bolder end of the pixie spectrum gets more coverage in the punk pixie cut ideas collection.
Long Pixie With Layered Top
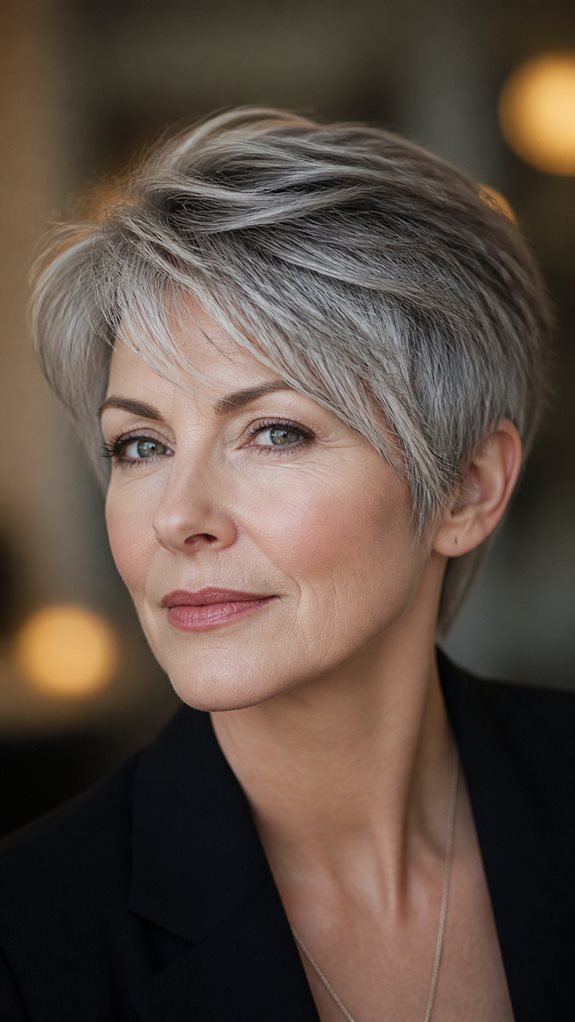
Three or four layers cut through the crown, with two to three inches of length on top against a closely cropped side and nape, gives this the most length of any pixie on this list while keeping the cropped sides that define the shape.
A trim every five to six weeks keeps that layered structure defined. This grows out a bit more forgivingly than the shorter cuts earlier in this list, since there’s more length for the layers to fall into as they grow.
A volumizing mousse at the roots followed by diffuser drying lifts and separates each layer instead of letting them settle into one solid section.

Pixie Cut With Defined Nape Detail
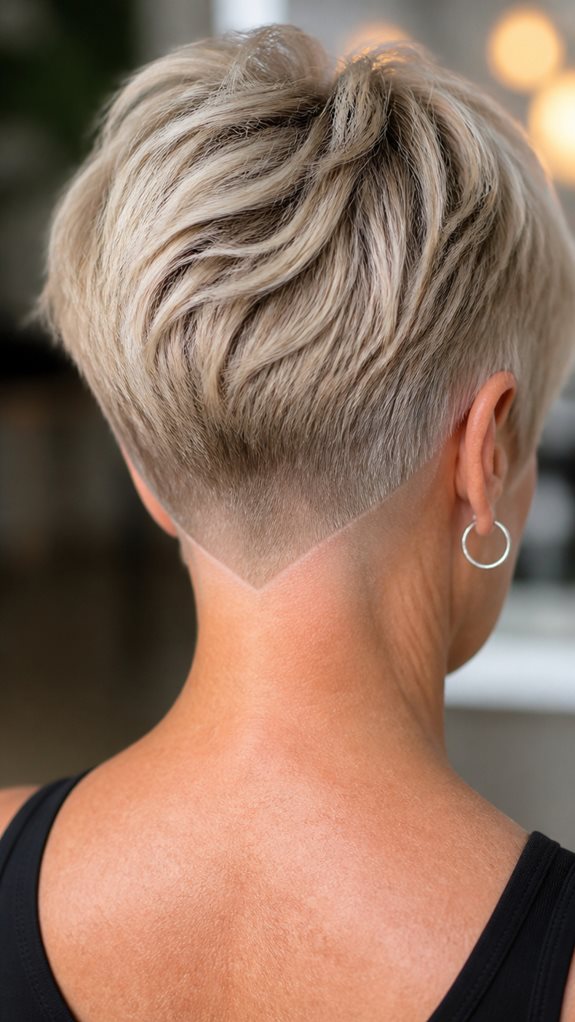
This is a finishing detail that can be added to almost any pixie shape above, not a standalone cut on its own. The stylist works specifically on how the hairline meets the neck at the very back.
A smooth taper fades gradually into the skin for a classic look; a carved nape line cuts a crisper, more geometric edge instead.
Fine hair actually shows this detail more clearly than thicker hair does, since there’s less bulk covering the shape of the line underneath.

The Spiky Textured Pixie Cut
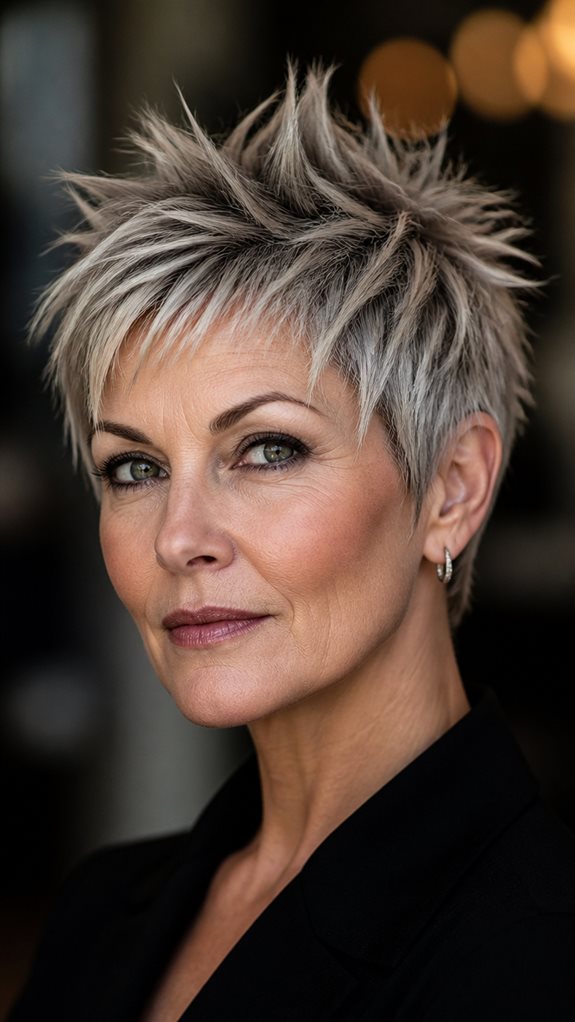
Layers left slightly longer on top give enough length for the spikes to actually hold, since hair cut too short has nothing for the product to grip onto.
A matte pomade or texturizing paste worked in with fingertips, separating sections rather than smoothing them, is what builds the spiked shape.
Trims every four to five weeks matter here specifically because growth softens a spiky shape faster than it would a smoother one, since the extra weight from new growth pulls the spikes down first.


Color-Enhanced Pixie for Fine Hair
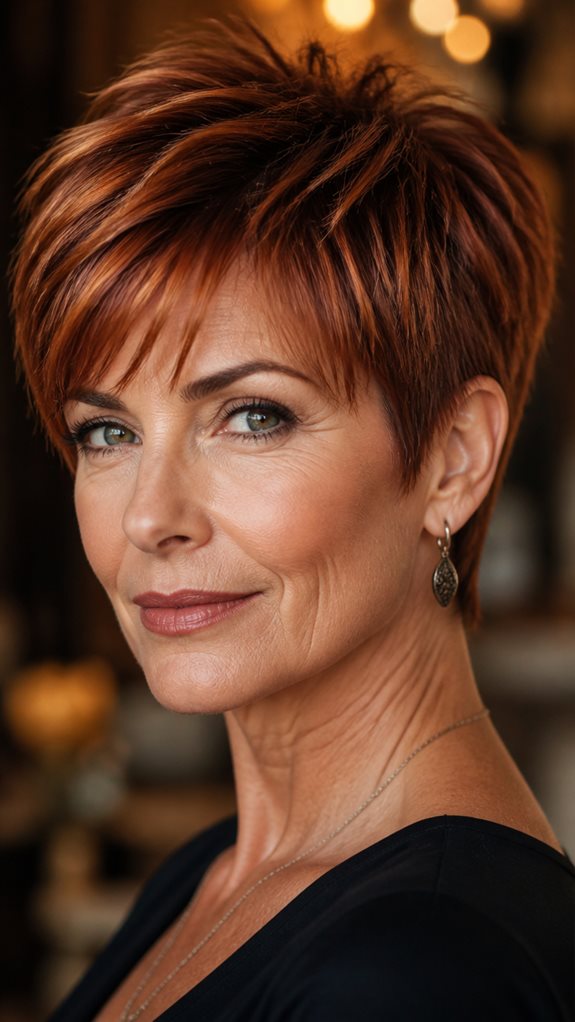
Highlights and lowlights placed close together create the visual contrast that makes strands look thicker than they are, an effect a single flat color simply can’t produce.
A single-process, all-over color is worth avoiding here specifically, since it flattens the appearance of already-thin strands instead of adding the depth this cut needs.
Ask your colorist to place contrast near the crown and nape rather than evenly through the whole head, since that’s where the cut has the least natural bulk to work with. More on the technique side of this lives in the hair color shades for women over 50 guide.


Slicked-Back Edgy Pixie Cut
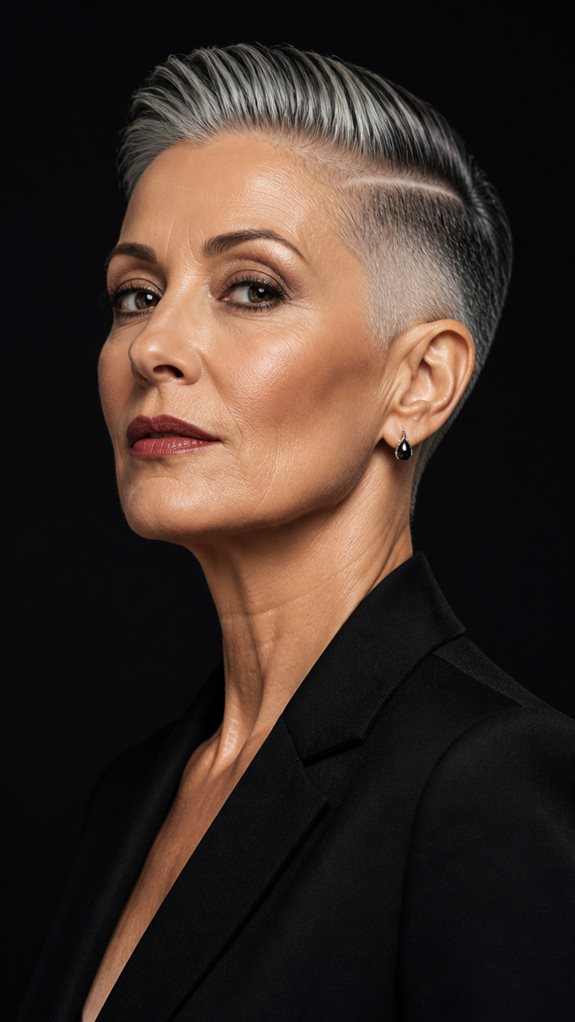
A strong-hold pomade or gel pushes the top back and away from the face, which is a styling technique rather than anything the cut itself needs to do differently.
Product amount is the main variable to get right. Too little and the shape collapses by midday; too much and fine hair looks visibly weighed down instead of structured.
Keep the sides tight and the crown sleek so this comes across as intentional rather than just slicked down without a plan.


Pixie With a Deep Side Part
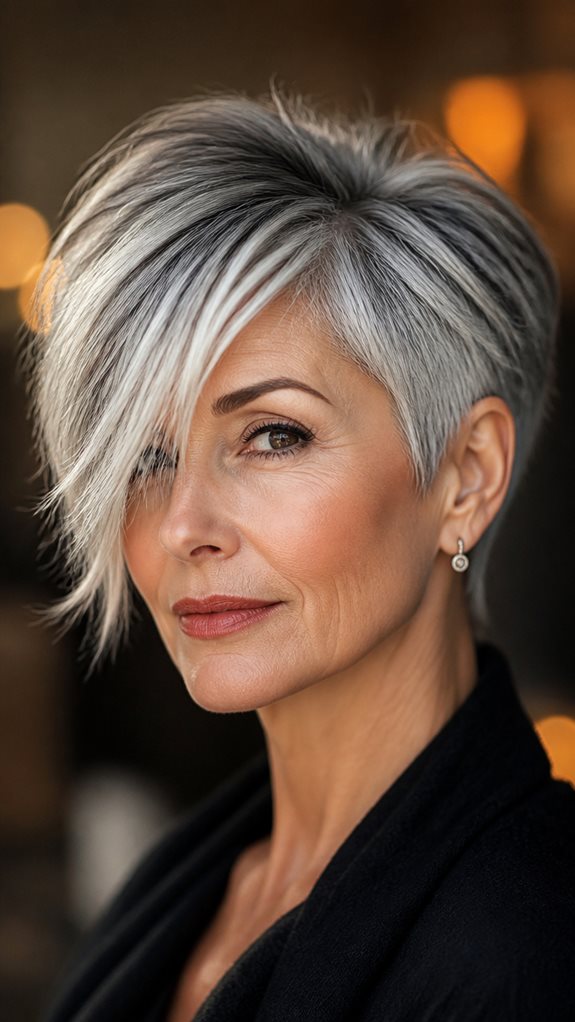
The part itself creates the asymmetry here, not the cut underneath it, which means this works on almost any pixie shape without needing a specific cutting technique.
A deep part, well off-center rather than a standard side part, sweeps more volume to one side and leaves the other noticeably closer to the head.
A lightweight pomade or texturizing spray keeps the part line defined without weighing down the heavier side, and small pins can hold it in place through a windy day.


The Mohawk-Inspired Pixie Cut
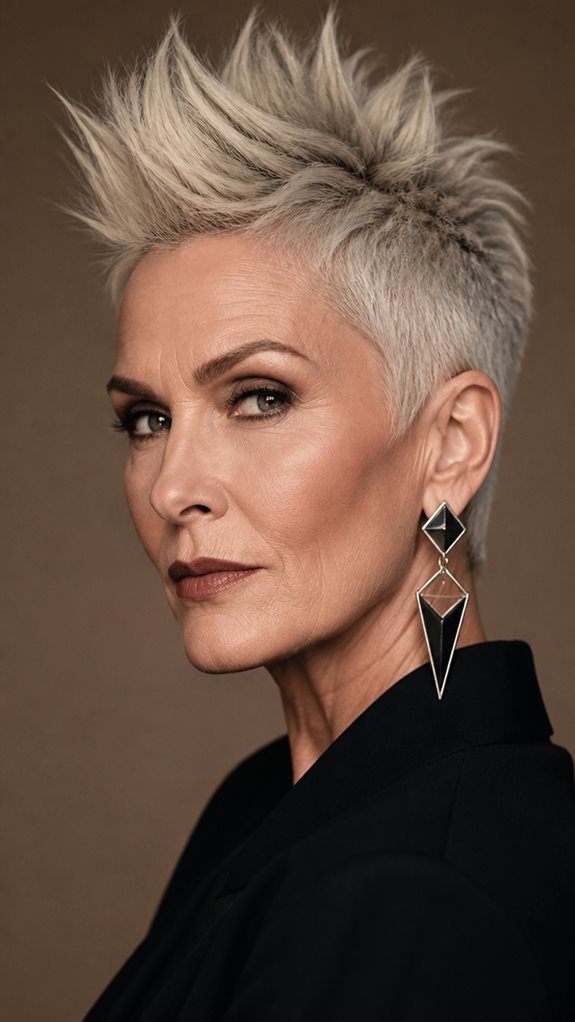
Unlike the faux hawk earlier, which styles a standard pixie into this shape daily, this version is cut with a genuine strip of longer hair running from the forehead to the nape, so the shape holds without restyling it from scratch each morning.
That center section can still be pushed up for a sharper look or brushed to one side for something more toned down, depending on the day.
Fine hair actually holds this shape well, since there’s less weight along that center strip working against the lift.

Micro Pixie Cut for Fine Hair
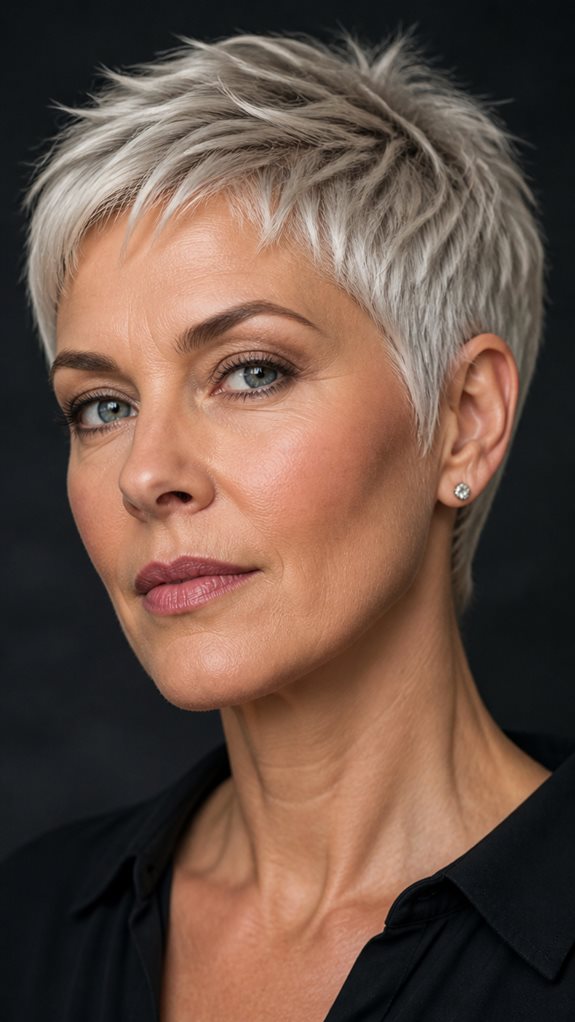
This is the shortest option on this list, tight at the nape, bare at the sides, and cropped close on top with barely any length left anywhere to work with.
Removing that much bulk eliminates the flat, limp look fine hair tends to fall into once it has any real length to hang from.
A pea-sized amount of light wax or pomade is genuinely all this needs. Trims every three to four weeks are non-negotiable here, since even a small amount of growth throws off a shape this tight.


Tousled Bedhead Pixie Cut
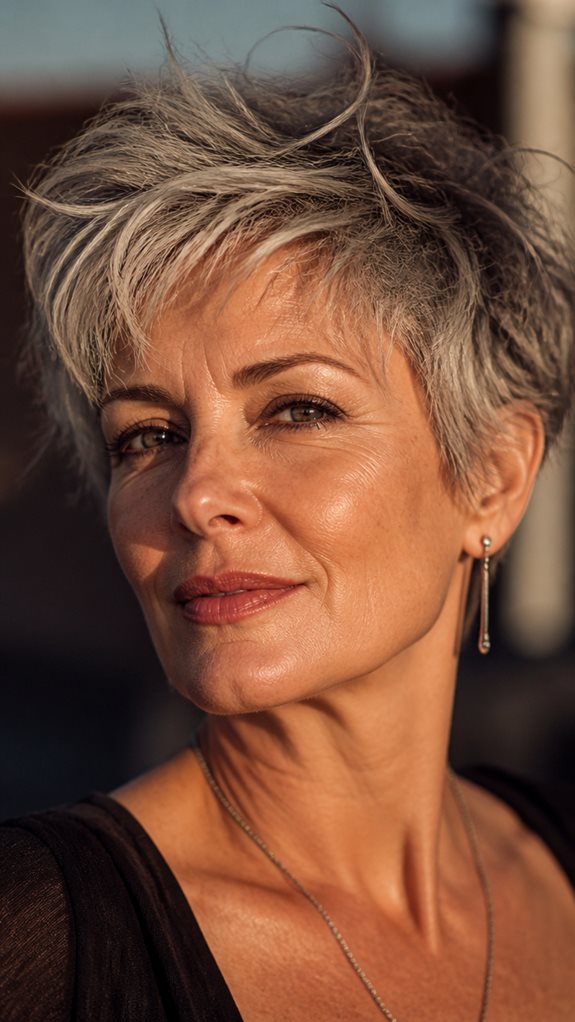
This is another styling approach that works on nearly any pixie base above rather than a distinct cut, built on finger-scrunching and diffusing instead of smoothing things into place.
A texturizing spray or soft pomade keeps strands from falling flat without adding the stiffness a stronger-hold product would.
Dry shampoo doubles as a styling tool here, not just a cleanup product, since it refreshes volume at the roots between washes.


The Blunt-Fringed Pixie Cut
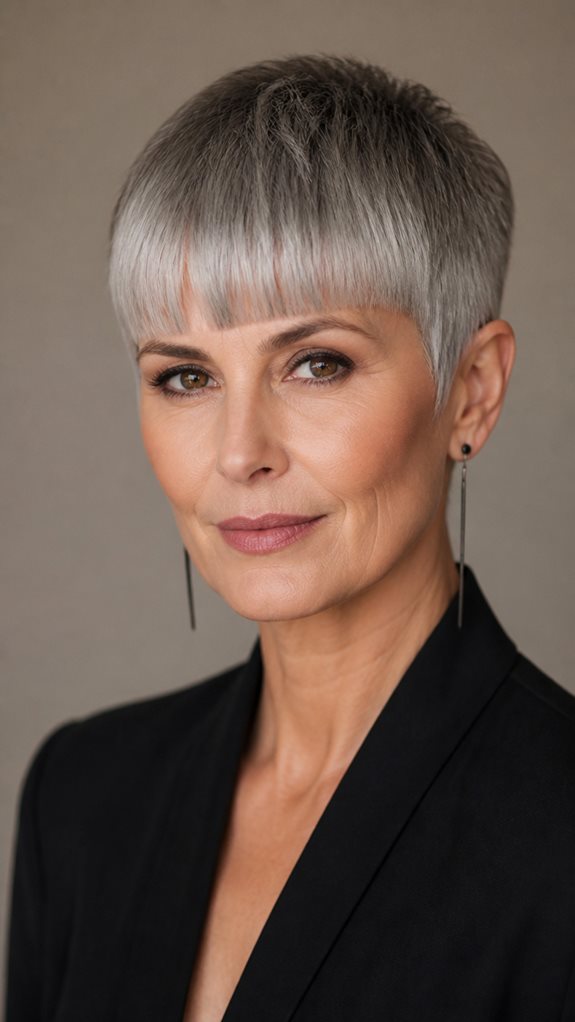
A straight-across fringe adds visible density right at the forehead, which is exactly where a fine-haired pixie usually has the least bulk to work with.
The fringe should land just above the brows. Longer softens the effect more than intended; shorter tips it into looking severe instead of sharp.
Because there’s no layering to soften it, this fringe needs a precise trim on its own schedule, separate from the rest of the cut, or it grows out unevenly first.


Pixie Cut With Contrasting Texture
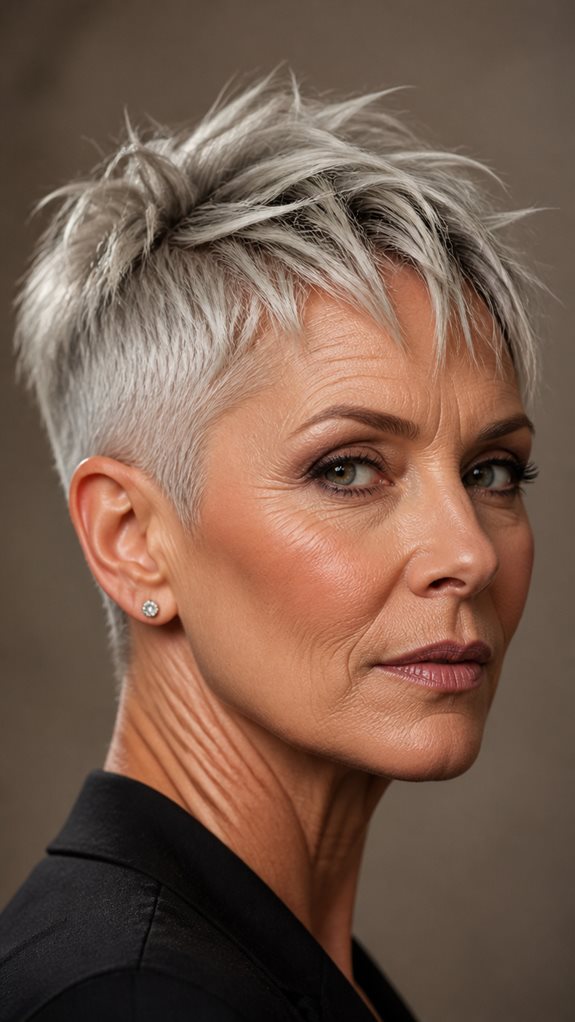
This combines two finishes in one cut: sides smoothed flat and close to the head, crown left rougher and piece-y, rather than applying one texture uniformly across the whole head.
A light pomade smooths the sides down while a matte clay or texturizing spray roughs up the crown, which means two products doing two different jobs on the same cut.
The sleek sides highlight bone structure while the textured crown adds the dimension fine hair usually can’t produce on its own.


Frequently Asked Questions
How Often Should Fine Hair Be Trimmed to Maintain a Pixie Cut?
Every four to six weeks for most versions, closer to three to four weeks for the tightest cuts, like the micro pixie or shaved sides, where even a little growth shows immediately.
Can Women With Round Faces Pull off Edgy Pixie Cuts?
Yes. Volume kept on top rather than at the sides, paired with a tapered side length, elongates a round face rather than adding width to it the way an evenly full cut would.
What Hair Products Work Best for Fine Hair Pixie Cuts?
Lightweight volumizing mousse at the roots and a small amount of texturizing paste at the ends cover most of these cuts. Heavier waxes and creams tend to weigh fine hair down rather than defining it.
Does Coloring Fine Hair Before a Pixie Cut Cause Damage?
It can, particularly with bleach or heavy lightening. Coloring two to three weeks before the cut gives fine strands time to recover some strength first, rather than cutting and coloring in the same appointment.
Are Pixie Cuts Suitable for Women With Thinning Hairlines?
Yes. Shorter length reduces the weight that pulls thinning hair flat, and texturizing spray applied right at the roots adds enough lift to make sparse areas far less noticeable.
Final Thoughts
Fine hair after 50 doesn’t have to mean giving up on style. Shorter length works with fine hair’s actual limitations instead of fighting them, creating real density that longer styles can’t manage on their own.
Bring a clear reference photo of whichever cut catches your eye, since the difference between these styles usually comes down to a specific cutting or styling technique a stylist can’t guess from a vague description. Pick the one that fits your routine and go with it.