23 Simple Short Winter Nail Designs
You’ll maximize short nails with high-impact winter designs like classic matte burgundy using two thin coats, icy blue tips for a modern French twist, and silver chrome on one or two accent nails per hand.
Deep plum with glossy topcoat delivers sophisticated elegance, while minimalist snowflake details work perfectly on nude bases. Apply ridge-filling base coat first, then use precise strokes and cap your free edges for extended wear.
Strategic placement of holographic topcoats, copper metallics with rose-gold undertones, and winter white with silver striping creates dimensional effects that draw attention to your nail beds rather than length.
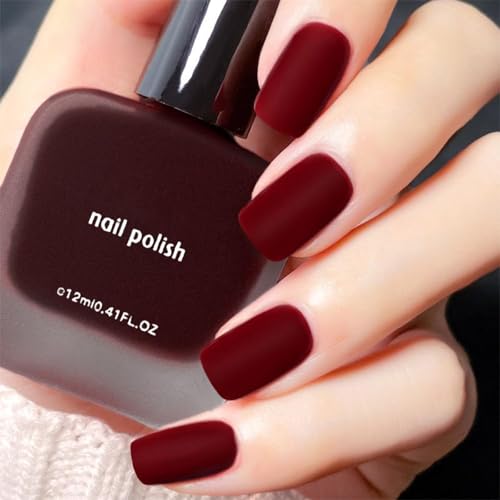
Classic Matte Burgundy

Classic matte burgundy transforms standard nail polish application into a sophisticated cold-weather statement.
You’ll achieve optimal results by selecting burgundy shade variations that complement your skin’s undertones—cooler tones pair with blue-based burgundies, while warmer complexions suit brown-leaning shades.
Apply two thin coats of your chosen burgundy, allowing each layer to dry completely.
Matte finish techniques require specific steps: cleanse nails with alcohol to remove oils, then apply matte top coat using deliberate, even strokes.
Don’t overwork the product, as this creates streaking.

Icy Blue Tips
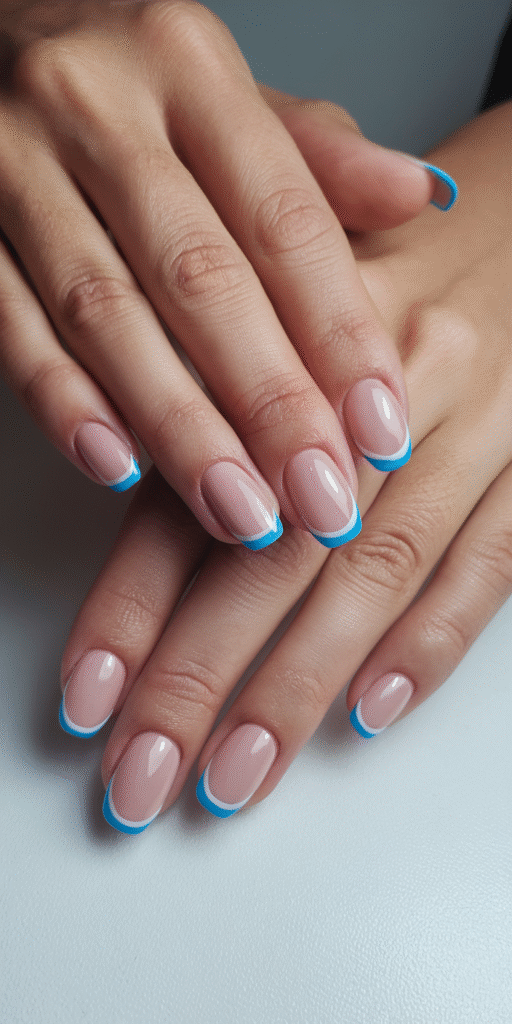
Icy blue tips offer a contemporary twist on the classic French manicure, perfect for winter styling. This design uses cool-toned blue polish instead of traditional white, creating a frosty, modern look.
The technique works on both natural and artificial nails of any length.
To create icy blue tips, start with a sheer nude or clear base coat for foundation. Apply metallic or shimmer-infused blue polish precisely along the tip edge, mimicking the French manicure smile line.
Seal with a glossy topcoat to enhance the icy effect and extend wear time.


Silver Chrome Accent Nails

Mirror-like brilliance defines silver chrome accent nails, which transform standard manicures through high-shine metallic powder application.
Chrome powder is applied over gel polish using a silicone applicator, buffing the pigment into the tacky layer for maximum reflectivity. This technique works best on one or two accent nails per hand, creating focal points without overwhelming your winter aesthetic.
Current silver chrome trends favor placement on ring fingers or asymmetric patterns across multiple nails. A no-wipe gel top coat seals the powder and prevents tarnishing.
Proper cuticle preparation and base coat application ensure smooth chrome adhesion and extended wear.


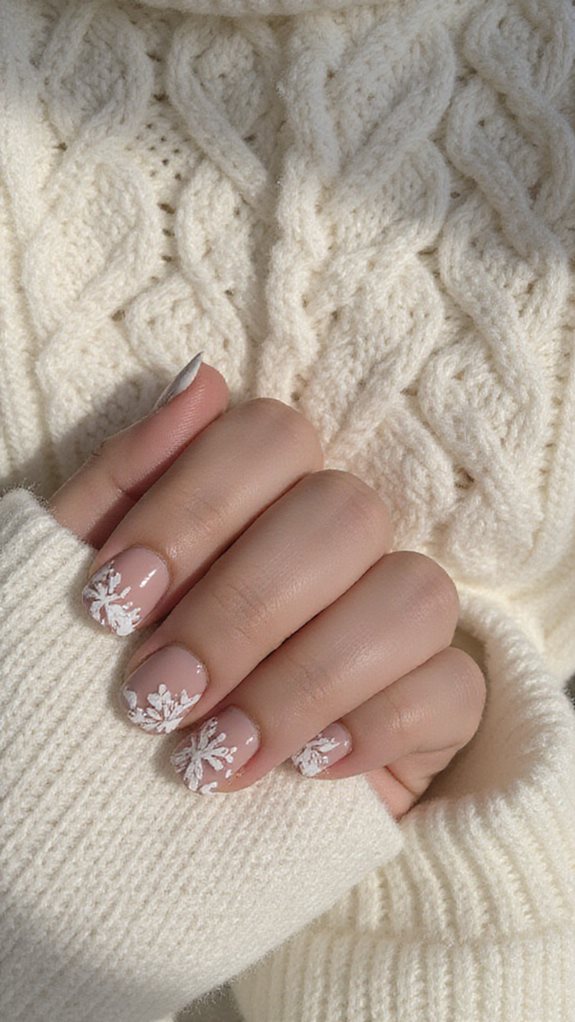
Minimalist Snowflake Details
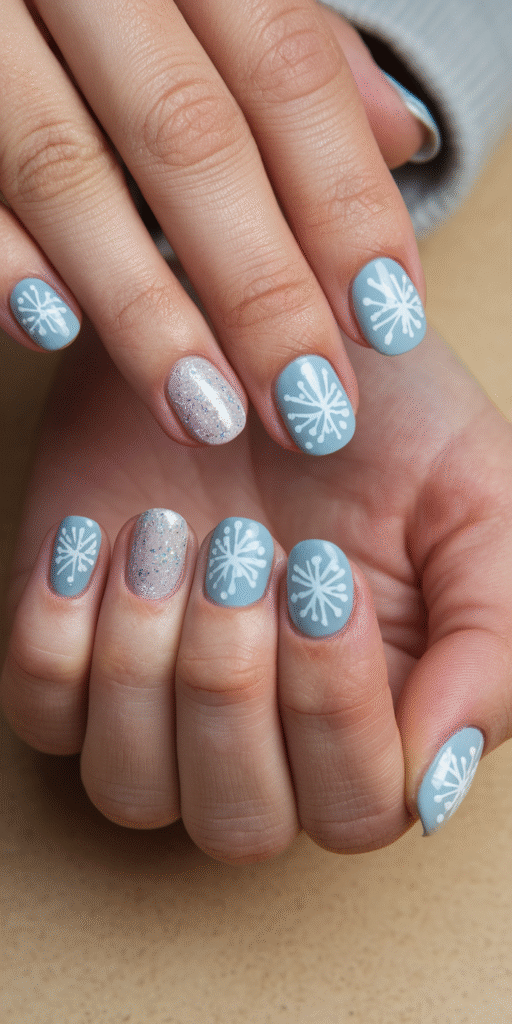
Delicate geometric patterns recreate winter’s crystalline structures through precision nail art techniques that require minimal tools yet deliver maximum impact.
Achieve professional snowflake patterns using a fine-detail brush or dotting tool with white gel polish on nude, pale blue, or grey base coats. Focus on single-accent nails rather than full sets to maintain minimalist designs that don’t overwhelm short nails.
Apply thin lines radiating from a central point, creating six-armed symmetrical structures. Add tiny dots at line intersections for dimensional detail.
Work with high-pigment formulas that provide opacity in one stroke, eliminating buildup that appears bulky on shorter lengths.


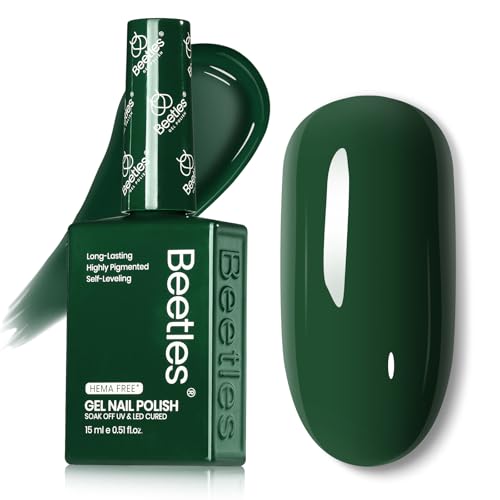
Deep Forest Green
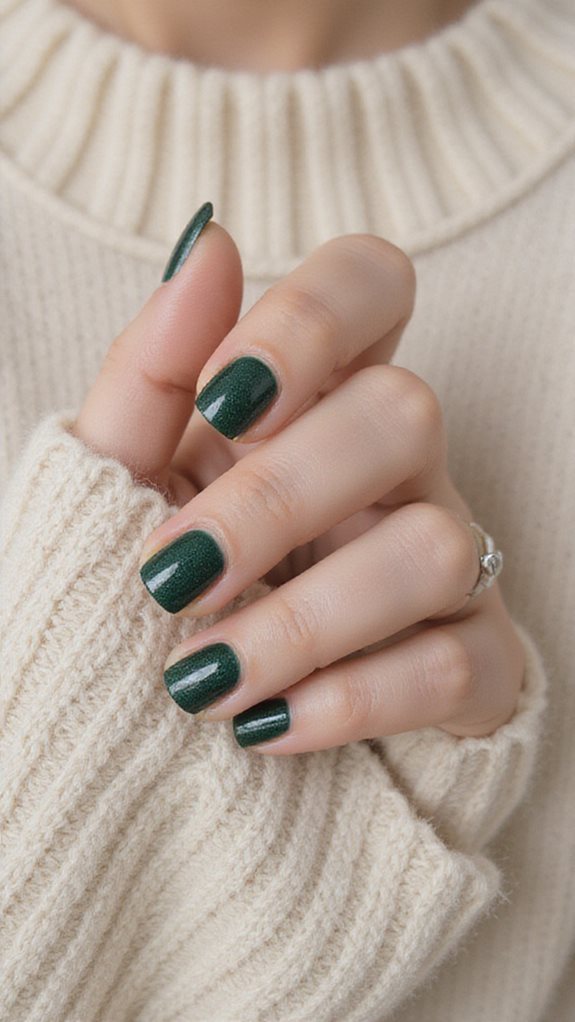
Deep forest green brings rich, saturated color to winter manicures while providing a sophisticated alternative to traditional holiday reds.
This jewel-toned shade delivers optimal opacity with two coats of pigment-dense formulas over a neutral base. Gel polish systems offer superior color saturation and extended wear through winter’s harsh conditions.
For deep green nail art applications, precise brush control ensures flawless accent details.
Apply micro-dots of metallic gold or silver using a dotting tool to create constellation patterns across the nail bed.
Matte topcoats over glossy deep green bases establish dimensional contrast that pairs beautifully with nude undertones and complements cool-toned skin.


Nude With White Dots
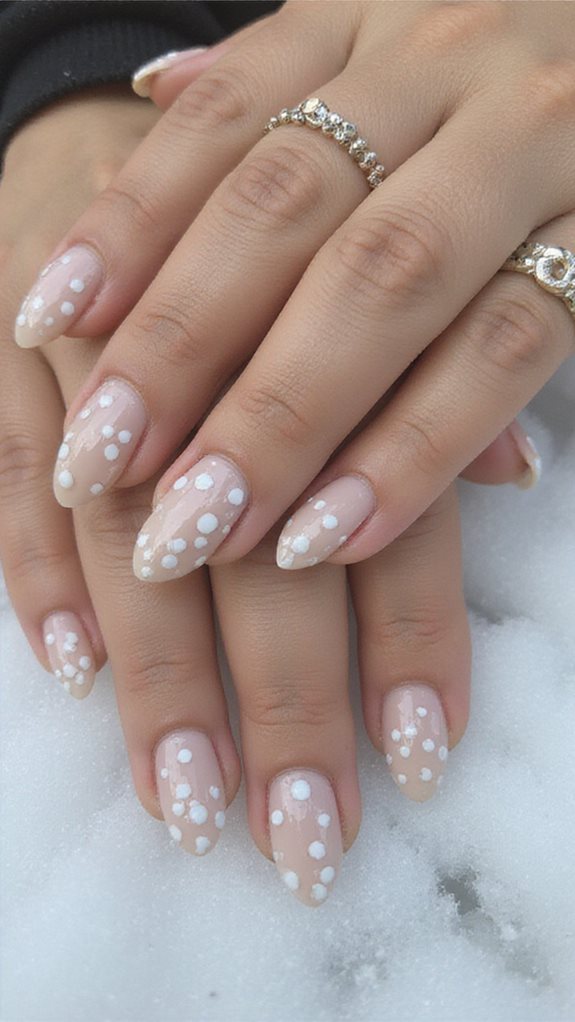
Nude bases with white dots deliver versatile elegance through minimalist design principles that work across professional and casual settings.
This approach requires precise application techniques to achieve uniform dot placement and consistent sizing. You’ll need a quality dotting tool or bobby pin for controlled application.
Apply two coats of nude base polish, ensuring complete opacity before adding white dot designs.
Space dots evenly using a grid pattern, or cluster them at the cuticle line for modern asymmetry.
White gel polish provides superior opacity over regular lacquer, reducing the need for multiple applications per dot.

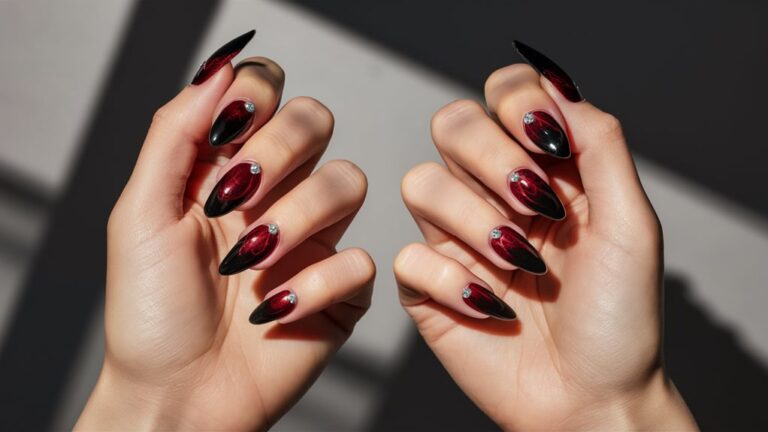
Navy Blue and Gold Flakes
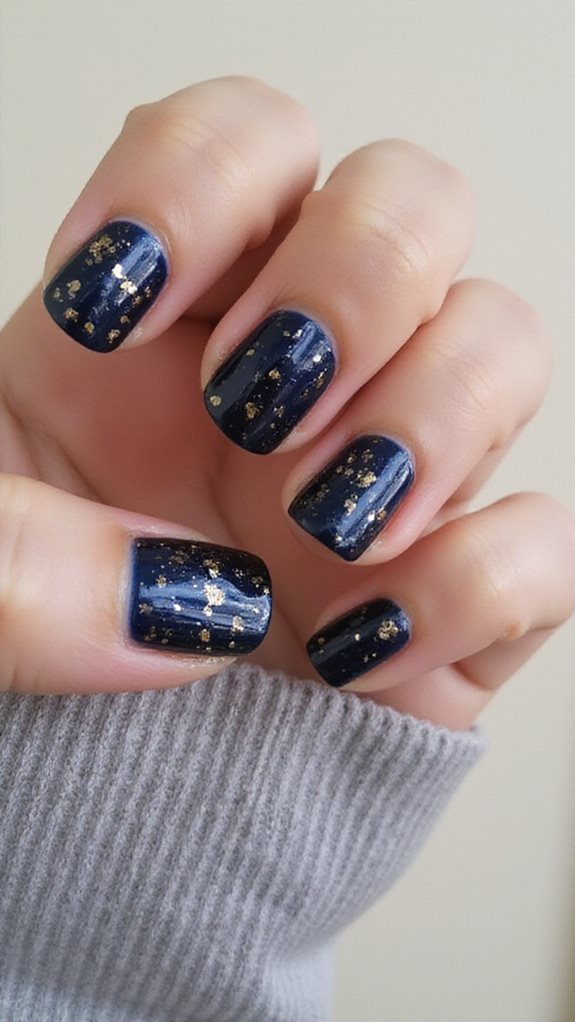
Navy blue polish creates dramatic depth when paired with metallic gold flakes, transforming simple manicures into statement designs suitable for evening events and winter celebrations.
Apply two coats of navy blue base for optimal elegance, ensuring complete opacity. While the second coat remains tacky, press gold flakes onto your nails using tweezers or a silicone tool, concentrating them at the tips or dispersing them randomly.
You’ll achieve maximum sparkle by varying flake sizes and placement density. Seal the design with a thick gel top coat, ensuring you encapsulate all flake edges to prevent lifting.
This combination works exceptionally well on short nails, where the concentrated sparkle doesn’t overwhelm the smaller canvas.


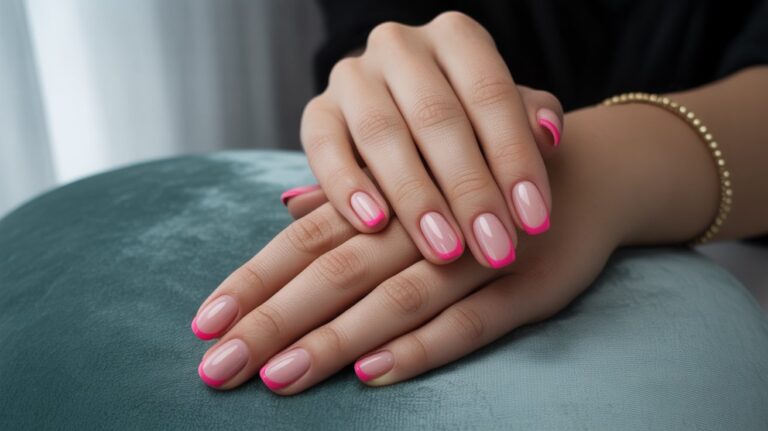
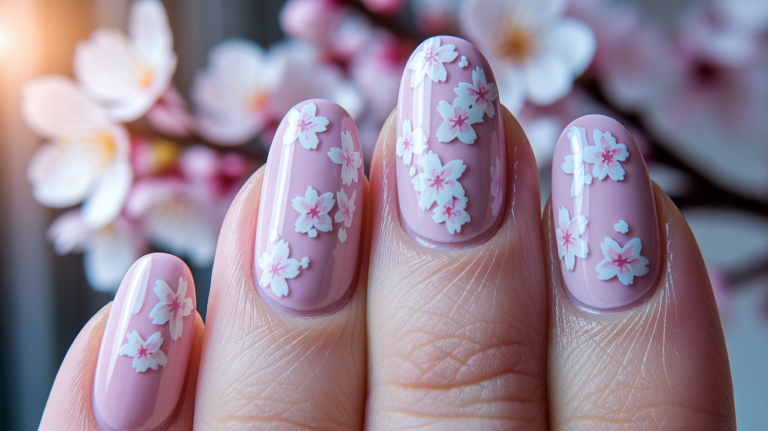
Sheer Pink With Silver Glitter
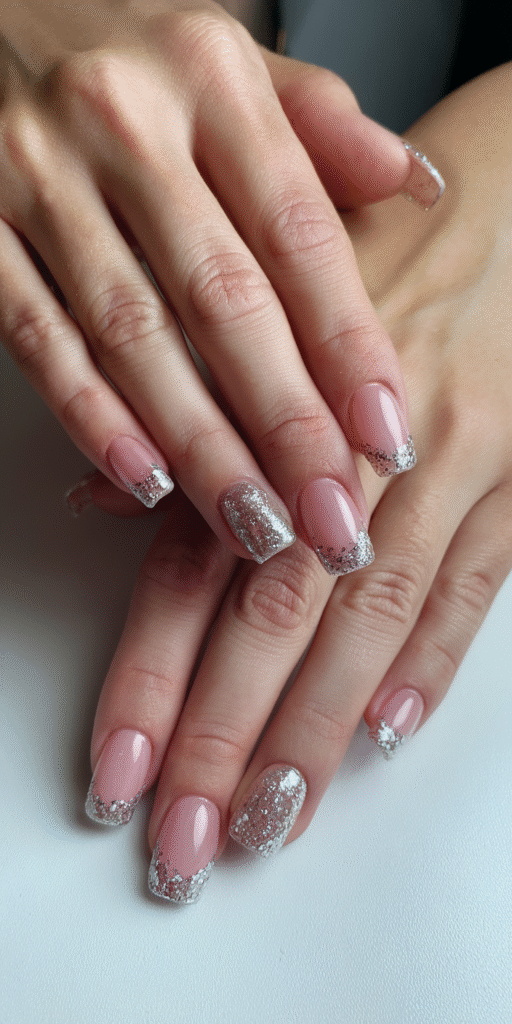
Sheer pink polish layered with silver glitter creates an ethereal, dimensional effect that captures winter’s delicate frost without appearing overly formal.
Optimal results come from applying two thin coats of sheer pink base, allowing each to dry completely before proceeding. This combination offers versatility through three placement techniques: uniform coverage across the entire nail, concentrated tips for a gradient fade, or strategic dabbing on accent nails.
Sheer polish layering requires precise timing—wait 60 seconds between applications to prevent dragging. Seal with a glossy top coat to encapsulate glitter particles and prevent snagging.
This technique works exceptionally well on short nails, as the transparency prevents visual shortening while the metallic elements add sophistication.


Sweater Weather Knit Texture
Cable knit nail art brings the cozy texture of winter sweaters to your fingertips through dimensional polish techniques.
This design mimics the interlocking patterns of knitted fabric using stamping plates or carefully applied gel polish with dotting tools. Colors like cream, caramel, burgundy, and forest green create an authentic knitwear aesthetic.
The technique builds dimension through layered application, forming characteristic X and V cable patterns with raised polish lines. A matte top coat eliminates shine to enhance the fabric-like finish.
This intricate design works best as an accent nail to showcase the detailed textural effect.


Frosted White Ombre
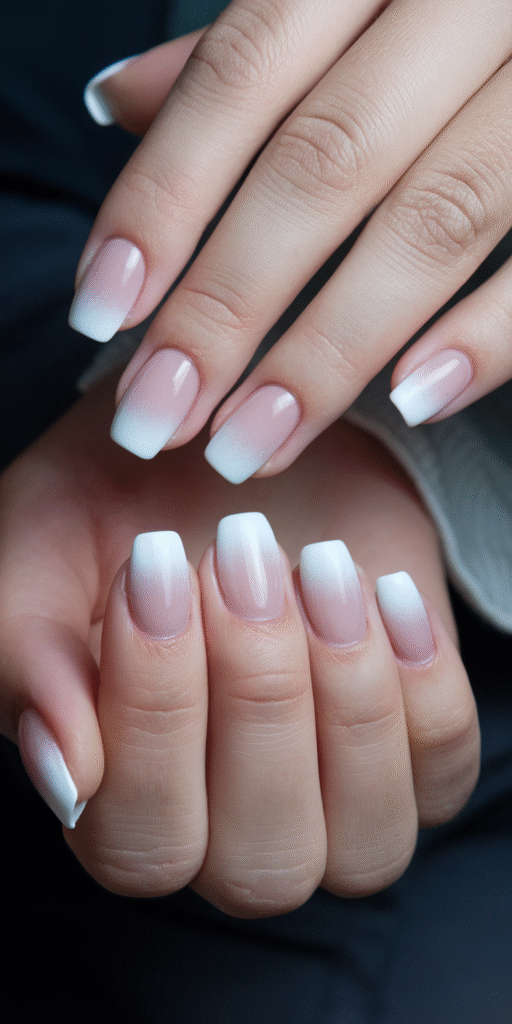
Frosted white ombre creates a seamless transition from translucent nail tips to opaque bases, mimicking the gradual accumulation of frost on winter windows.
Achieve this effect by applying a sheer white polish at your cuticle, then gradually building opacity toward the tip using layering techniques. Work with makeup sponges to blend two to three white polish shades—ranging from milky translucent to pure opaque white.
Master ombre color techniques by dabbing rather than dragging your sponge across each nail. Three thin coats provide optimal color payoff.
Seal with a matte topcoat to enhance the frosty finish, or use glossy topcoat for an icy, glass-like appearance that catches winter light beautifully.


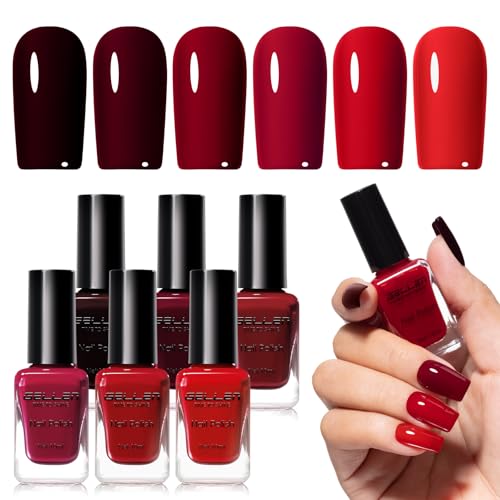
Cranberry Red Solid
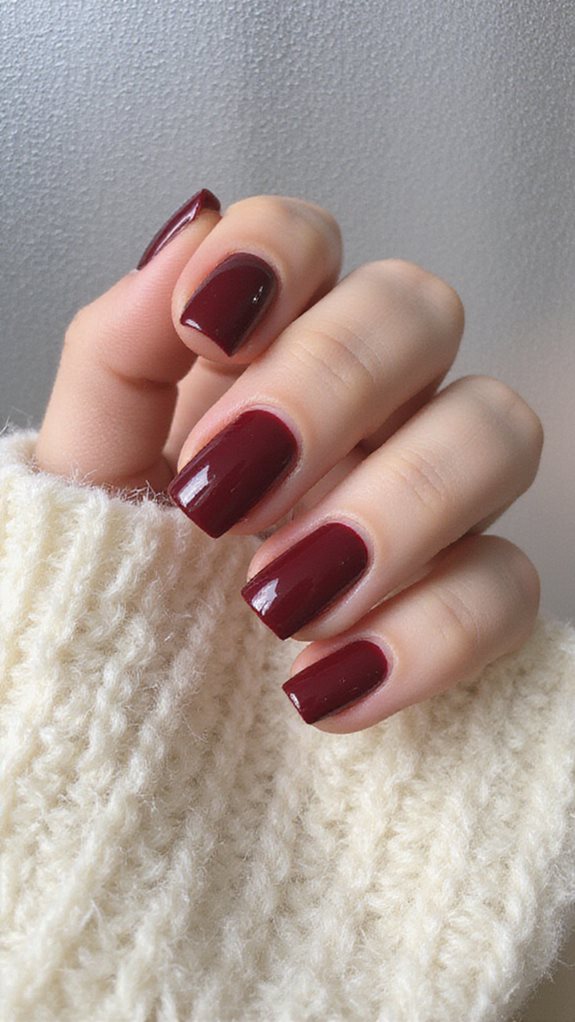
Deep cranberry red delivers a rich, winter-appropriate alternative to soft frost effects.
Gel polish formulations with high pigment concentrations require only two coats for full opacity. Apply a ridge-filling base coat first to create an even surface on short nails.
Cranberry red trends favor cool-toned formulas with blue undertones rather than orange-based reds.
Extend wear time to three weeks by capping the free edge during application. Cure each gel layer for 30-60 seconds under LED lamps and seal with a no-wipe top coat.


Pale Gray With Pearl Finish
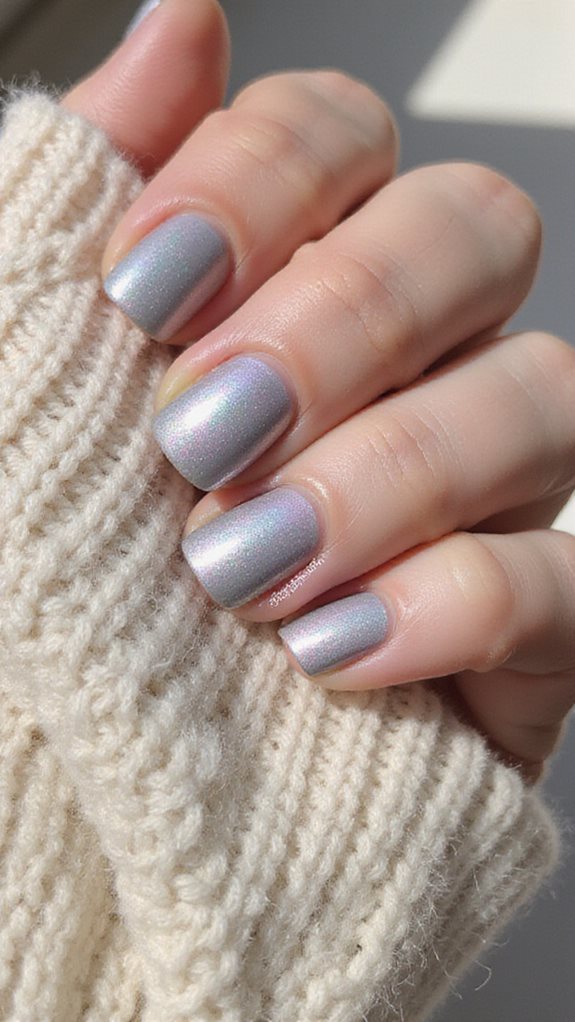
Pale gray polish with pearl finish creates a sophisticated winter manicure that complements both casual and formal settings.
Optimal pale gray elegance comes from applying two thin coats over a ridge-filling base. The pearl finish shine becomes most prominent when you select formulas containing genuine mica particles rather than synthetic alternatives.
For best results, work in controlled lighting to assess coverage uniformity. Apply each coat from cuticle to tip using three precise strokes—center, left, right.
The pearl particles settle evenly when you allow 90 seconds between applications, and sealing with a quick-dry topcoat designed for shimmer formulas enhances durability while maintaining the refined, luminous appearance.


Chocolate Brown and Cream Stripes
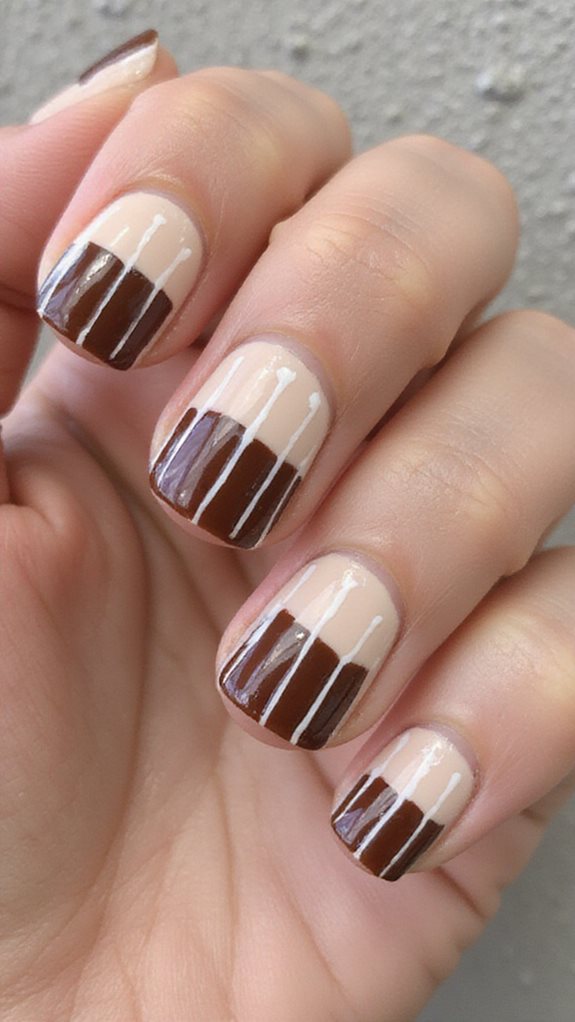
Chocolate brown and cream stripes create a timeless nail design perfect for any season. This classic color pairing offers versatility, working equally well for casual everyday wear or formal occasions.
The rich contrast between the deep brown base and light cream accents delivers visual impact without overwhelming the overall look.
Creating precise stripes requires the right tools and technique for professional-looking results. Striping tape provides the cleanest lines for beginners, while experienced nail artists can achieve beautiful freehand designs with a detail brush.
Both methods produce stunning striped patterns that showcase the elegant chocolate and cream combination.


Holographic Topcoat on Short Nails
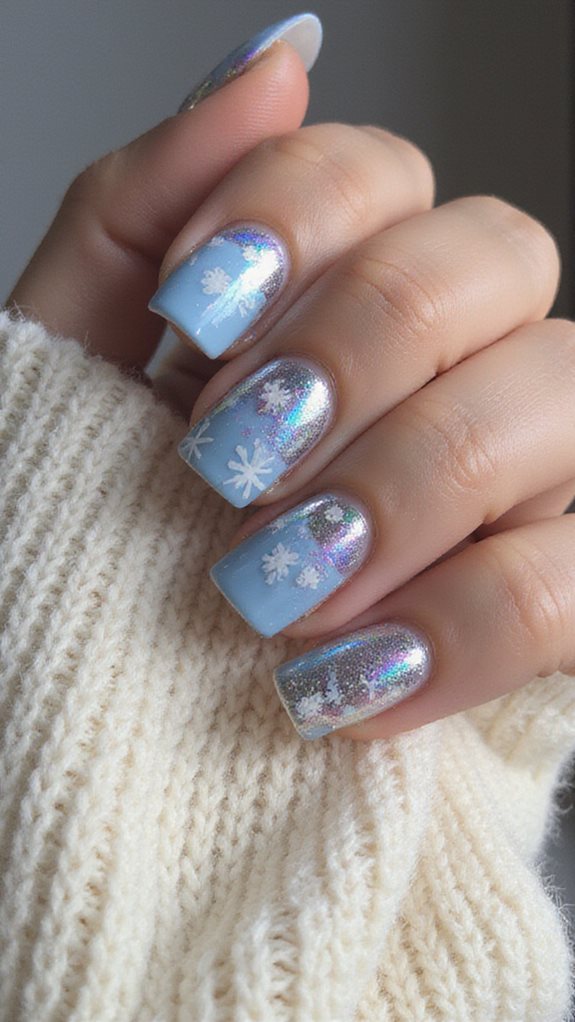
Holographic topcoats transform short nails into dimensional, light-catching canvases without requiring additional length or complex nail art.
Apply this finish over any base color—deep winter shades like navy, burgundy, or black work exceptionally well. The topcoat contains microparticles that refract light into rainbow spectrums, creating movement with every hand gesture.
For optimal results, apply one thin layer over completely dry base polish.
Select topcoats with fine particle distribution for subtle shimmer or chunky formulas for bold rainbow effects.
This technique maintains its prismatic finish for 7-10 days with proper base and top coat application.


Evergreen With Tiny Gems
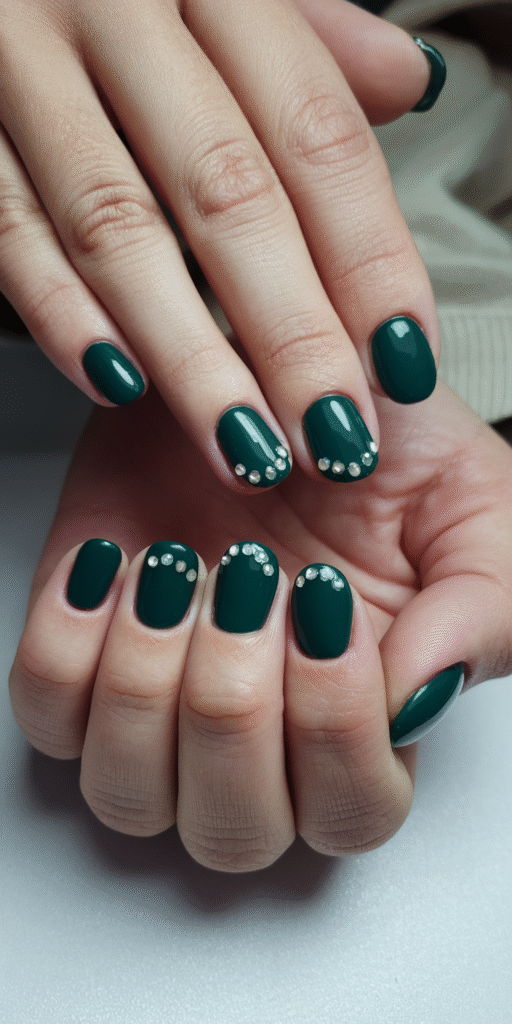
Emerald and forest green polishes provide the foundation for this winter manicure that combines rich evergreen tones with strategic crystal placement.
A quality evergreen color base coat that offers full opacity in two layers creates the perfect canvas. Apply your chosen shade evenly across all nails, ensuring proper edge sealing.
For tiny gemstone placement, use a dotting tool or tweezers to position 2mm crystals along the cuticle line or create accent patterns on ring fingers.
Arrange gems in linear formations, clustered groups, or scattered placements for visual interest. Seal the entire design with a thick layer of clear top coat, ensuring complete coverage over the gemstones for maximum longevity and preventing premature lifting.


Dusty Rose With Matte Topcoat
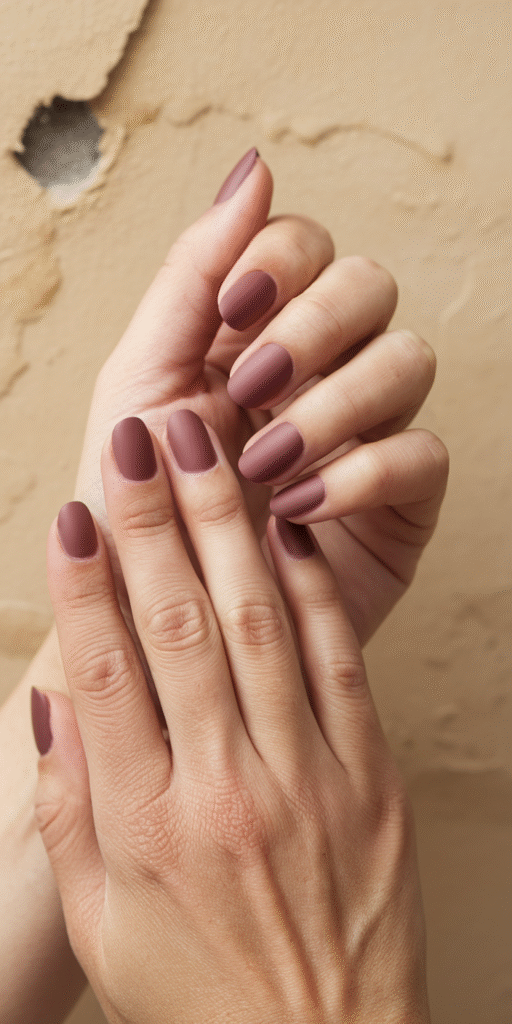
While jeweled accents create dramatic effects, matte finishes offer sophisticated subtlety for winter manicures. Applying two coats of dusty rose polish before your matte topcoat ensures optimal results.
Current dusty rose trends favor neutral-leaning shades that complement winter’s muted palette.
Matte finish techniques require specific application methods for a flawless look. Apply topcoat in thin, even strokes without over-brushing, which creates shine patches.
Reapply matte topcoat every four days since this finish shows wear faster than glossy alternatives.


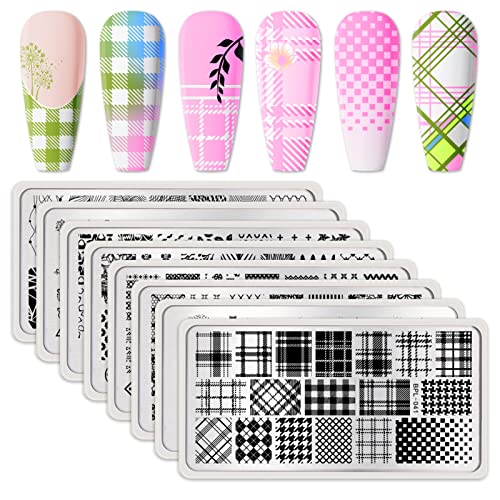
Black and White Plaid
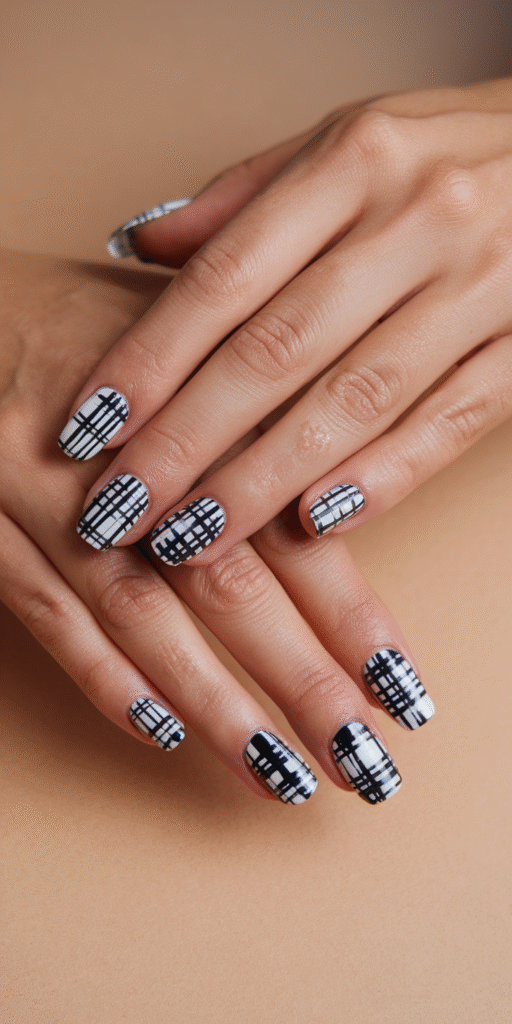
Classic plaid patterns transform into striking nail art when executed in high-contrast black and white. You’ll need a white base coat, black nail polish, and a fine-tipped striping brush for precision lines. Apply two coats of white polish first, then create vertical black stripes using your striping brush, spacing them evenly across each nail.
Once dry, add horizontal stripes to complete the plaid pattern. For authenticity, vary stripe widths by alternating between thin and thick lines to create depth and dimension. Seal with a glossy topcoat to enhance contrast and protect your design from chipping.


Champagne Shimmer
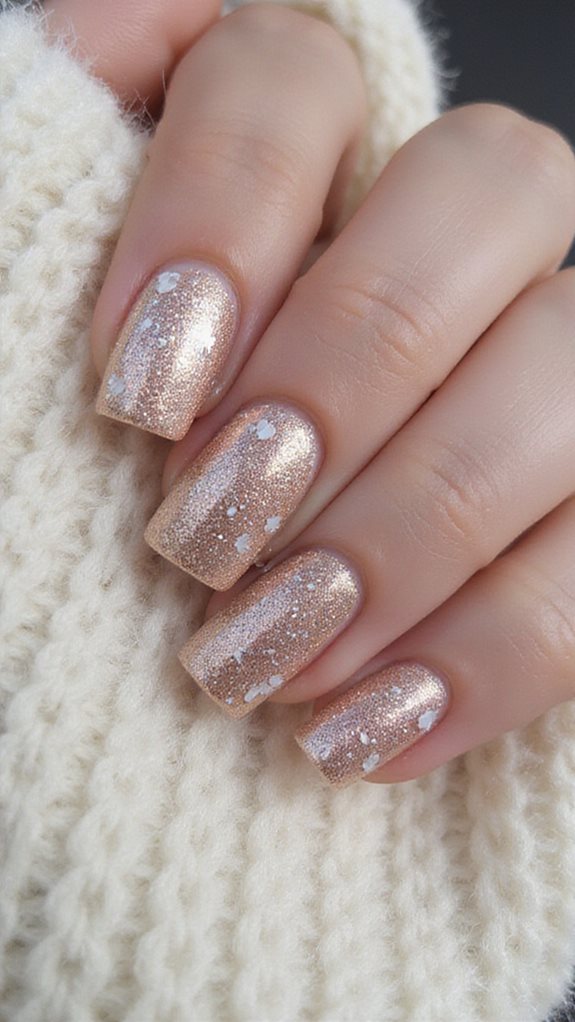
Champagne shimmer polish delivers sophisticated elegance through its metallic micro-particles that reflect light at multiple angles.
You’ll achieve optimal coverage by applying two thin coats rather than one thick layer, preventing clumping of the shimmer particles. The champagne shimmer color works exceptionally well on short nails because it doesn’t require extensive nail length to showcase its reflective properties.
For advanced champagne shimmer techniques, you can layer the polish over nude bases to intensify the metallic effect or apply it as an accent nail.
Use a gel top coat to seal the shimmer particles and prevent chipping. The formula’s fine-milled pigments create a mirror-like finish that complements winter’s subdued color palette while maintaining professional sophistication for any occasion.


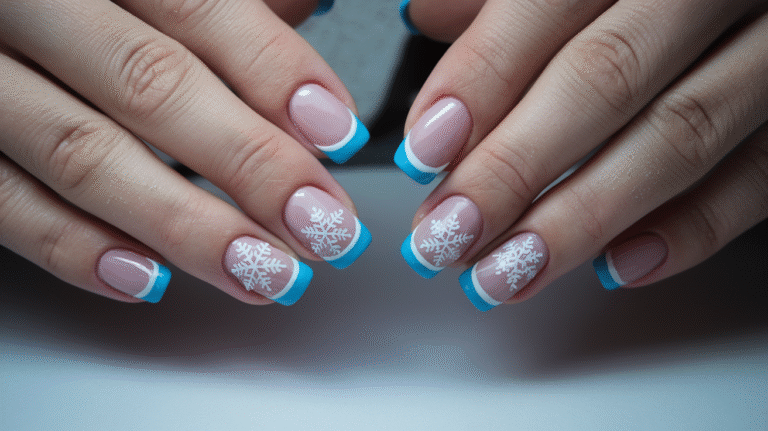
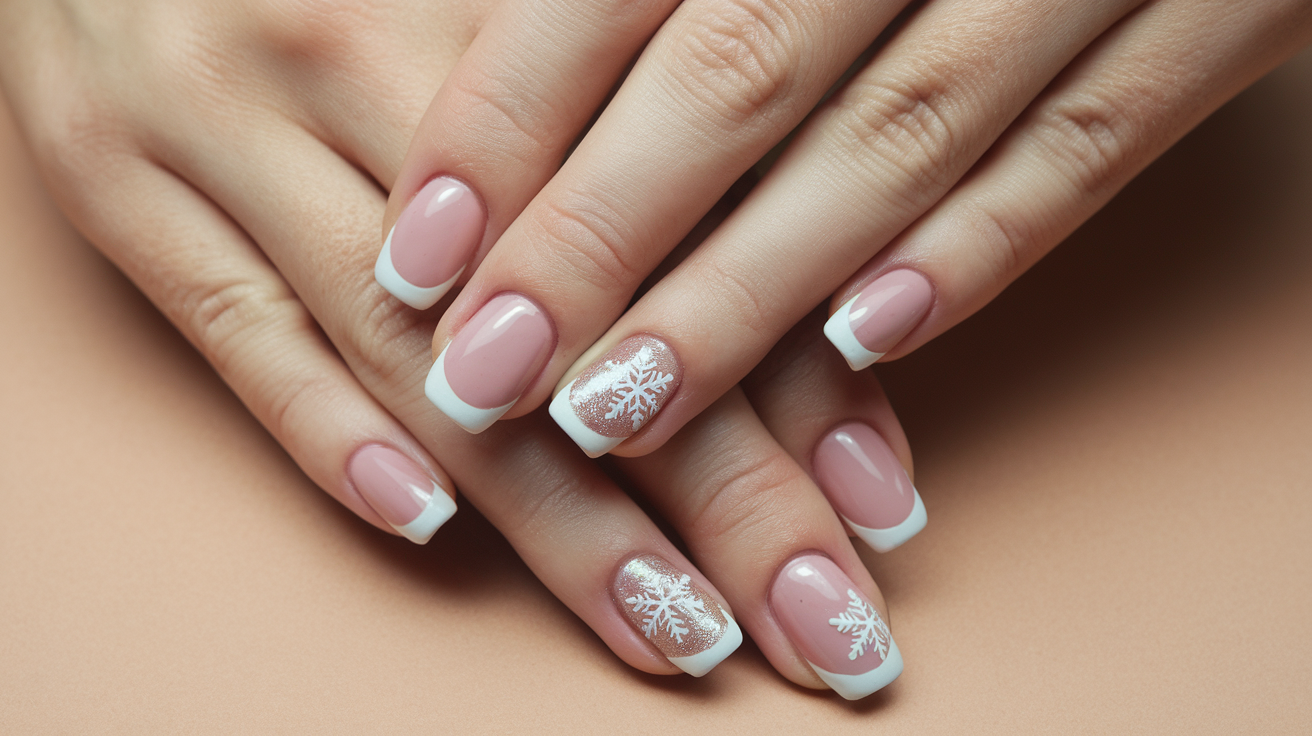
Snowflake French Tips
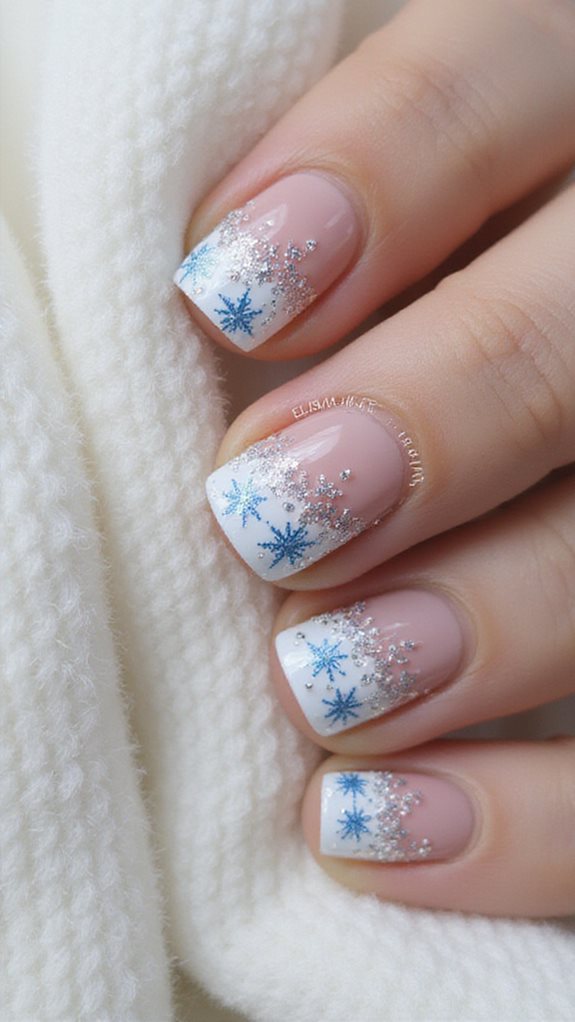
Snowflake French tips transform the traditional manicure by replacing the standard white tip with delicate winter motifs.
Apply a sheer nude or pale pink base, then create precise french manicure lines using white gel polish.
Once cured, position individual snowflake patterns along the tip’s edge using a fine detail brush or stamping plate.
Select snowflake decals or use a dotting tool to construct six-pointed crystalline structures.
Apply each design with steady pressure, ensuring clean adhesion.
Seal everything with a glossy top coat to prevent chipping and enhance dimensional contrast.


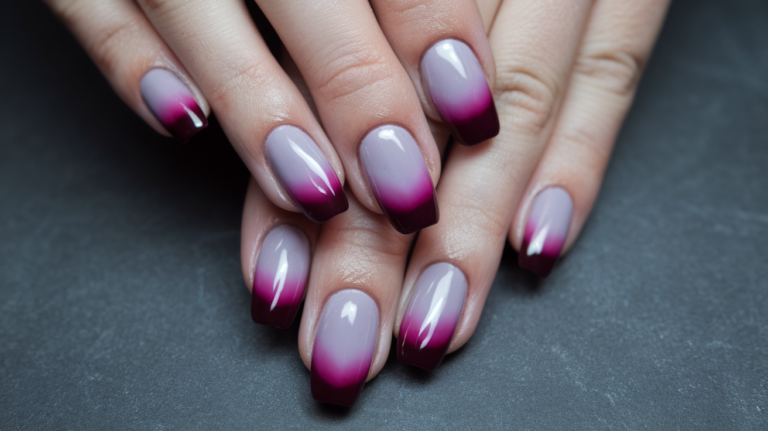
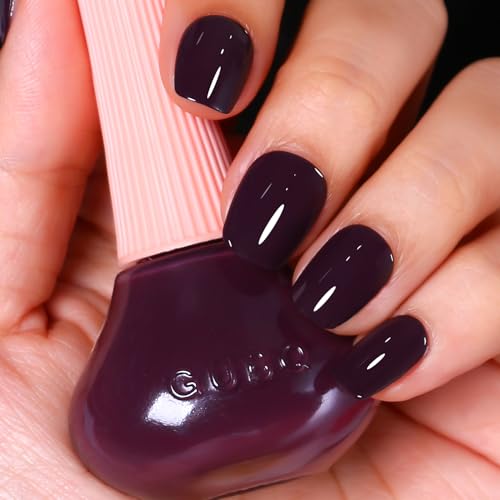
Deep Plum With Glossy Finish
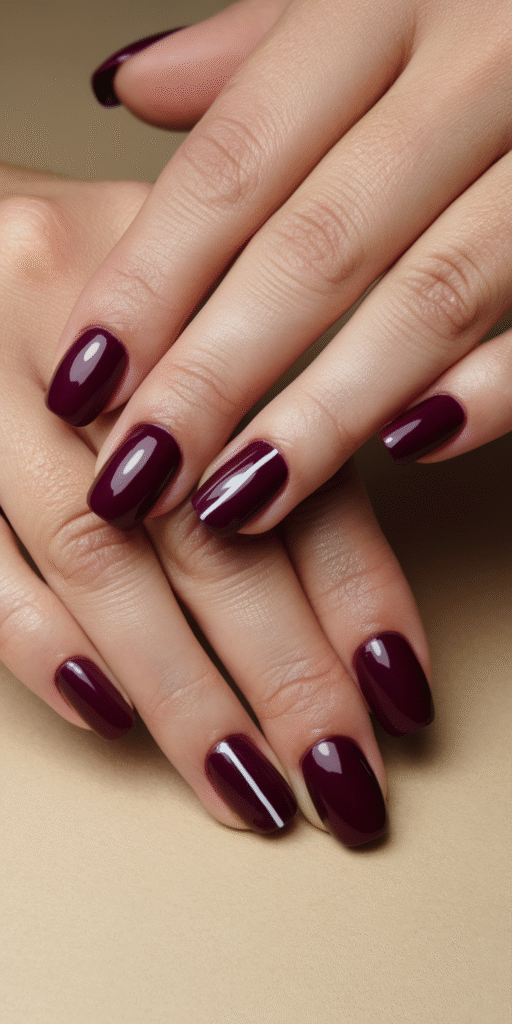
Deep plum nail polish brings sophisticated elegance to winter manicures through its rich, vampy pigmentation.
Achieve the best results by applying two thin coats instead of one thick layer to prevent streaking and ensure long-lasting wear. Select high-quality formulas that maintain deep color without appearing muddy.
The glossy finish creates stunning dimensional depth and mirror-like shine.
Apply your high-gloss top coat within two minutes of the final color layer for optimal adhesion and to prevent smudging.
Reapply the top coat every three days to maintain brilliance and protect against chipping.


Icy Lavender
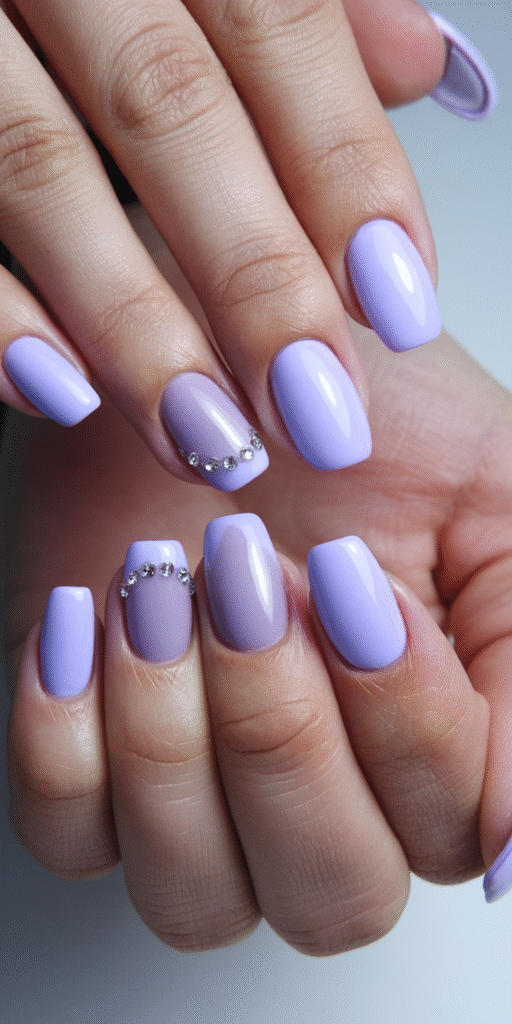
Icy lavender polish delivers a cool-toned pastel sophistication that captures winter’s ethereal quality without appearing juvenile.
This shade works exceptionally well on short nails, providing maximum color payoff in two coats when you apply thin, even layers from cuticle to tip. The delicate hue offers a fresh alternative to traditional winter colors while maintaining seasonal appropriateness.
Create dimensional interest through a lavender gradient by blending three shades—from pale ice to deeper violet—using a makeup sponge application technique.
For enhanced winter aesthetics, incorporate icy nail art using silver foil accents or white snowflake decals on accent nails. Seal everything with a high-gloss topcoat to prevent the pastel base from appearing chalky and maintain vibrancy for seven days.


Copper Metallic
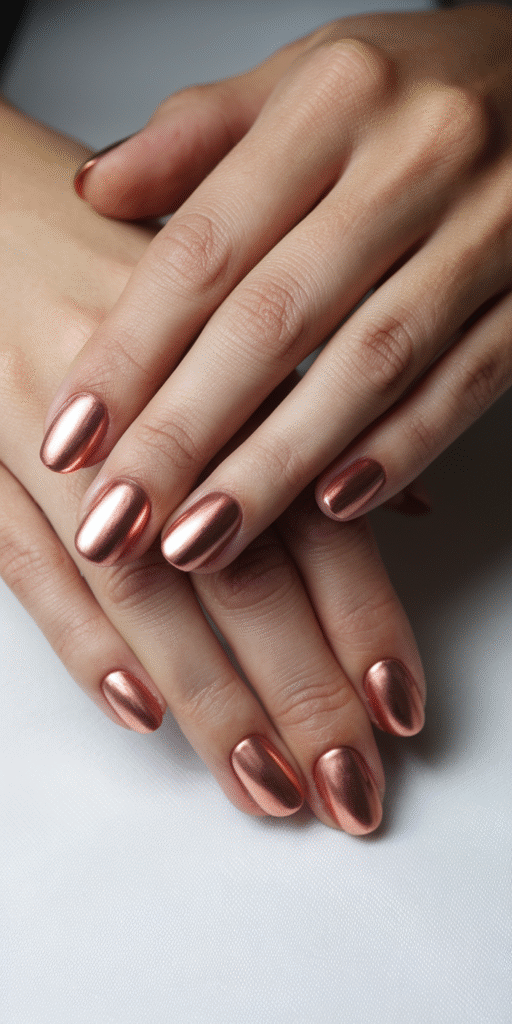
Copper metallic polish brings warmth to winter nail designs through its rose-gold undertones and reflective finish that catches light like burnished metal.
Optimal metallic sheen comes from applying two thin coats over a ridge-filling base coat, allowing each layer to dry completely between applications. The formula contains mica pigments that create dimensional depth when light hits your nails at different angles.
For enhanced copper accents, use striping tape to section off geometric patterns before applying the polish.
Layer copper over darker base colors like burgundy or forest green for a sophisticated contrast effect. Top with a high-gloss sealer to amplify the reflective properties and protect the metallic finish from dulling.


Winter White With Silver Striping
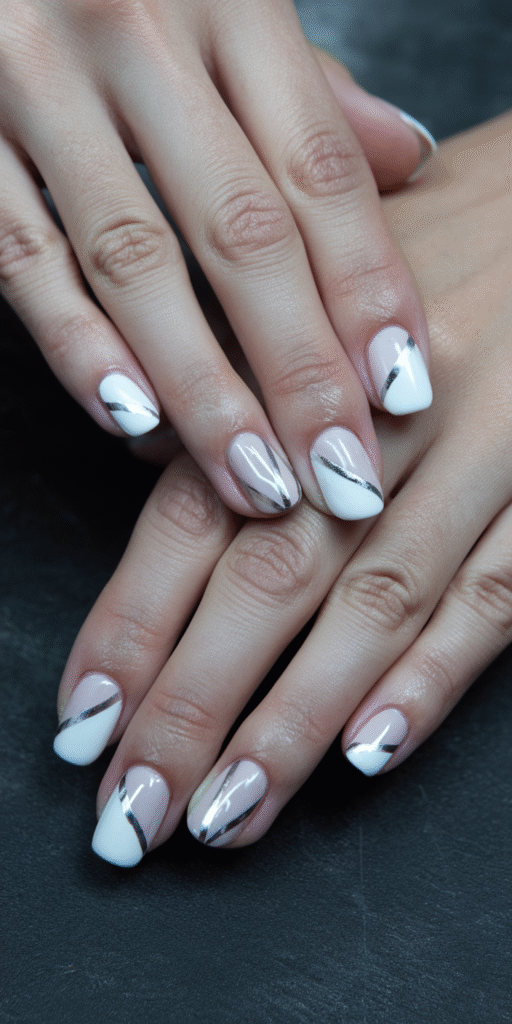
Winter white polish creates a clean canvas that transforms into elegant nail art when paired with precision silver striping techniques.
You’ll need striping tape or a detail brush to achieve sharp lines across your design. Apply two coats of opaque white base polish, ensuring complete coverage.
Once dry, position striping tape diagonally or vertically, then seal with silver nail polish for geometric patterns.
Use a thin detail brush dipped in metallic silver polish to hand-paint delicate lines like parallel stripes, chevron patterns, or minimalist single accent lines.
This technique works exceptionally well on short nails, where simple designs create maximum impact.


Frequently Asked Questions
How Long Do Winter Nail Designs Typically Last on Short Nails?
You’ll get 7-14 days of nail longevity with proper application techniques. Winter maintenance requires cuticle oil daily, wearing gloves outdoors, and applying quality top coat every 2-3 days to prevent chipping from cold-weather exposure.
What Nail Shape Works Best for Short Winter Nail Designs?
You’ll achieve optimal results with rounded or squoval nail shapes for short winter designs. These shapes maximize your nail surface area for intricate design trends while providing structural integrity that prevents chipping and ensures professional-looking application of seasonal techniques.
Can I Do These Winter Designs at Home Without Professional Help?
You’ll successfully execute winter designs at home using proper DIY techniques. Master essential nail art tips like thin brush control, dotting tool precision, and proper base coat application. Practice stamping methods and striping tape placement for professional-quality results.
How Do I Prevent Chipping on Short Nails During Winter?
You’ll prevent chipping by applying a quality base coat, maintaining proper nail care with cuticle oil, using quick-dry top coat, and protecting hands from winter moisture with gloves when exposed to cold temperatures.
What Base Coat Should I Use for Winter Nail Designs?
You’ll want a strengthening or ridge-filling base coat for winter designs. Choose base coat types that prevent staining under darker winter color palettes—look for formulas containing calcium, keratin, or nylon fibers for optimal adhesion and protection.
Finally
You’ll achieve professional winter nail results by maintaining precise application techniques throughout. Focus on proper base coat adhesion for matte finishes, controlled brush pressure for chrome effects, and steady hand positioning when detailing snowflakes.
Don’t rush your curing times between gel layers—it’s critical for longevity. Store your metallic and chrome polishes upright to prevent separation. Remember, you’re building dimension through strategic layering, not thickness.
Clean cuticle lines and sealed edges determine your manicure’s durability during winter’s harsh conditions.